


Get In Touch
Our customer support team is available for help.
Let's Talk Business!
© Copyright 2026 @ ERP Peers


Landed cost is the total price a business pays to get a product to its final destination. This includes the product cost, shipping fees, customs duties, taxes, and insurance. Managing landed costs correctly helps businesses set accurate prices, calculate real profit margins, and avoid financial surprises.
NetSuite helps you manage landed costs easily. It offers tools to track all costs related to bringing a product into your inventory. In this guide, we’ll walk you through everything you need to know about setting up and managing landed costs in NetSuite.
Landed costs affect several key areas of your business:
Poorly managed landed costs can lead to tax compliance issues, as inaccurate inventory valuation affects tax filings and audits. NetSuite’s automation ensures proper cost allocation, reducing compliance risks.
Without proper management, businesses risk losing money due to miscalculated costs or underpriced products. NetSuite helps you get accurate, real-time data on these costs to make informed decisions.
NetSuite’s Landed Cost feature automates the allocation of extra costs, such as freight, taxes, and customs, directly to inventory items. This ensures a precise total cost calculation for every product.
| Feature | Description |
|---|---|
| Accurate COGS Calculation | Ensures all costs are distributed correctly across inventory items. |
| Seamless System Integration | Works with NetSuite’s procurement and financial modules for consistent cost tracking. |
| Multi-Location Costing Support | Helps businesses allocate costs accurately across different warehouses or regions. |
| Flexible Cost Allocation Methods | Allows for cost distribution based on weight, volume, quantity, or value. |
| Allocation Method | When to Use | Example Scenario |
|---|---|---|
| Weight-Based | Heavy items incur higher shipping costs | Importing metals or machinery |
| Volume-Based | Bulkier items take more space in a container | Furniture, large electronics |
| Quantity-Based | Flat-rate shipping costs per unit | Books, small accessories |
| Value-Based | Higher-cost items should absorb more costs | Jewelry, high-end fashion |
With these features, businesses can ensure complete cost visibility and more accurate financial management.
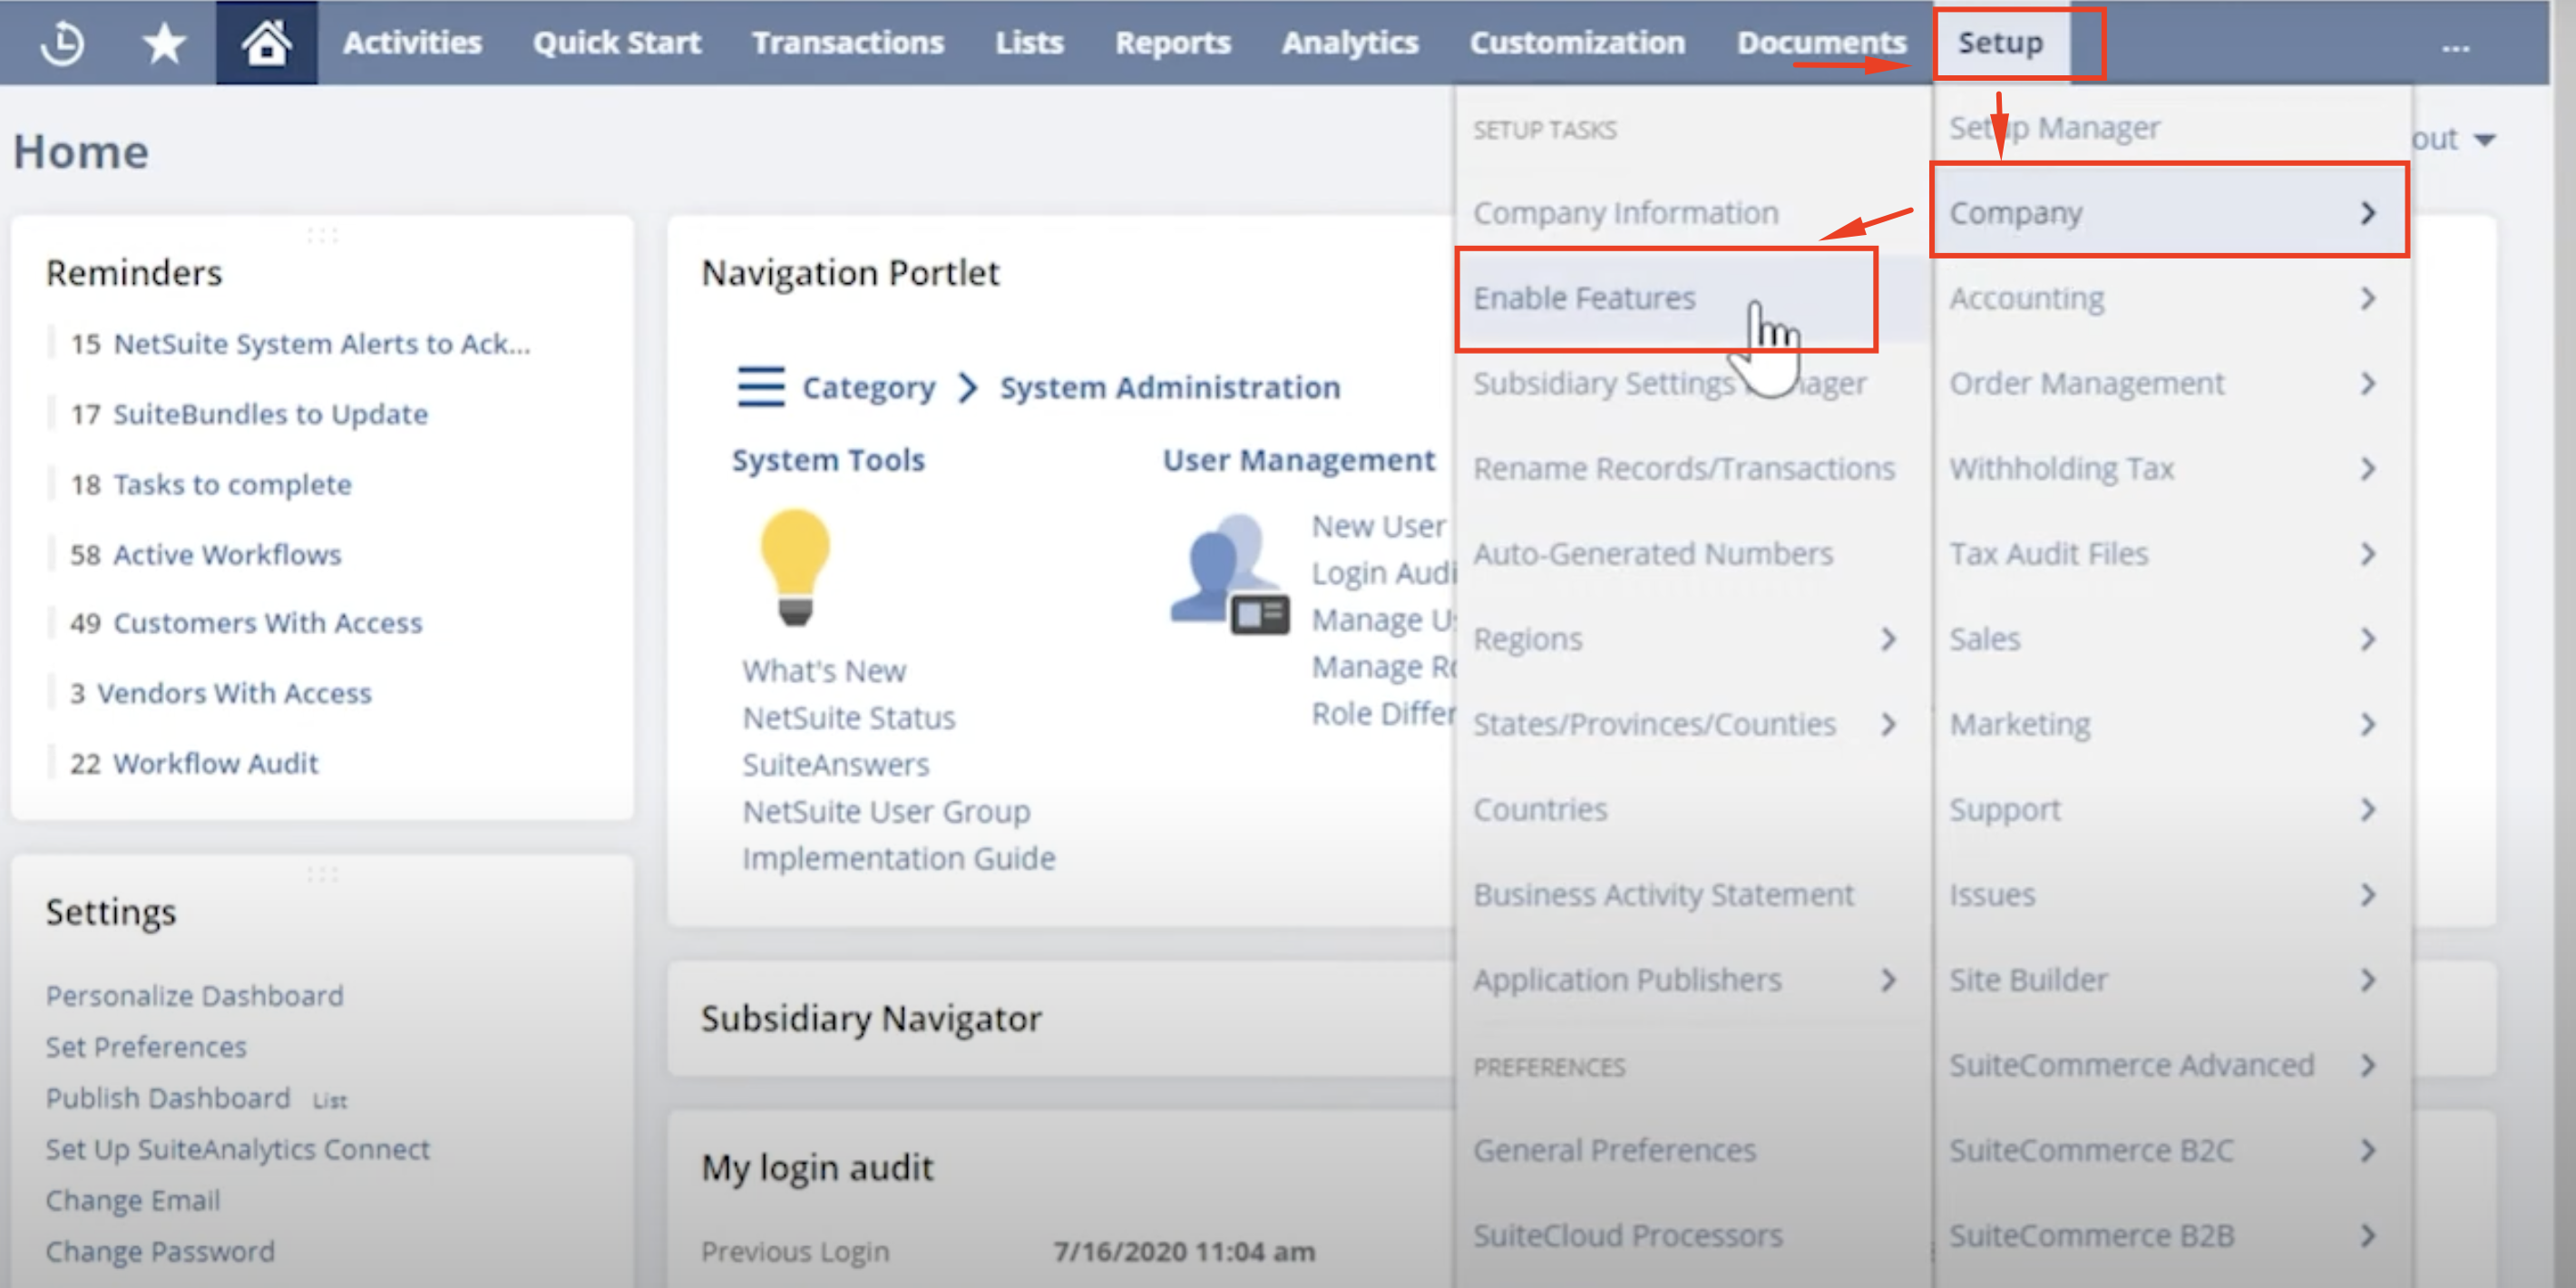
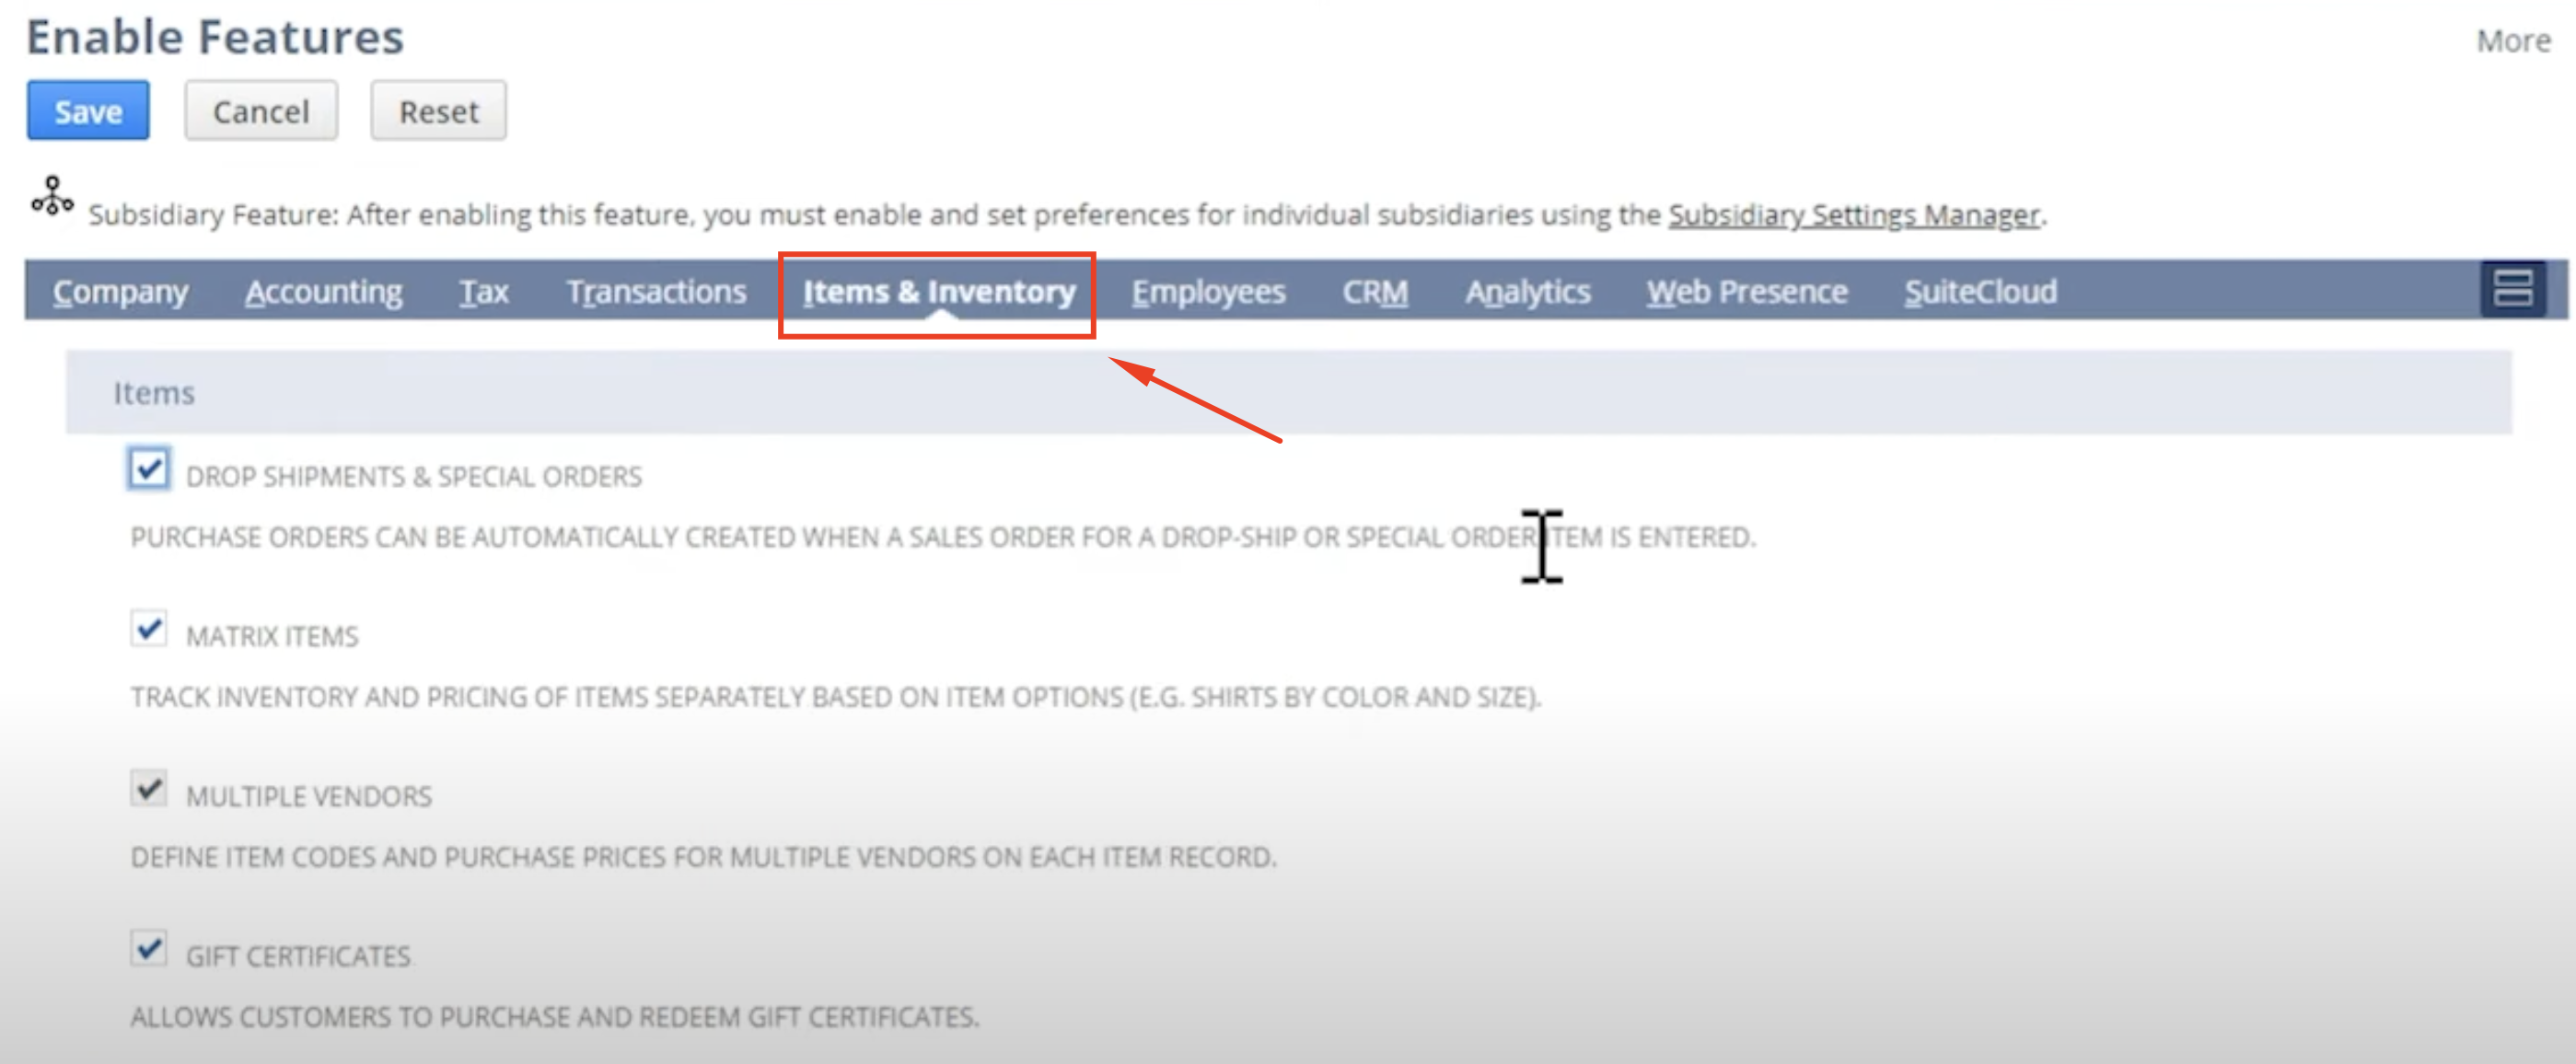
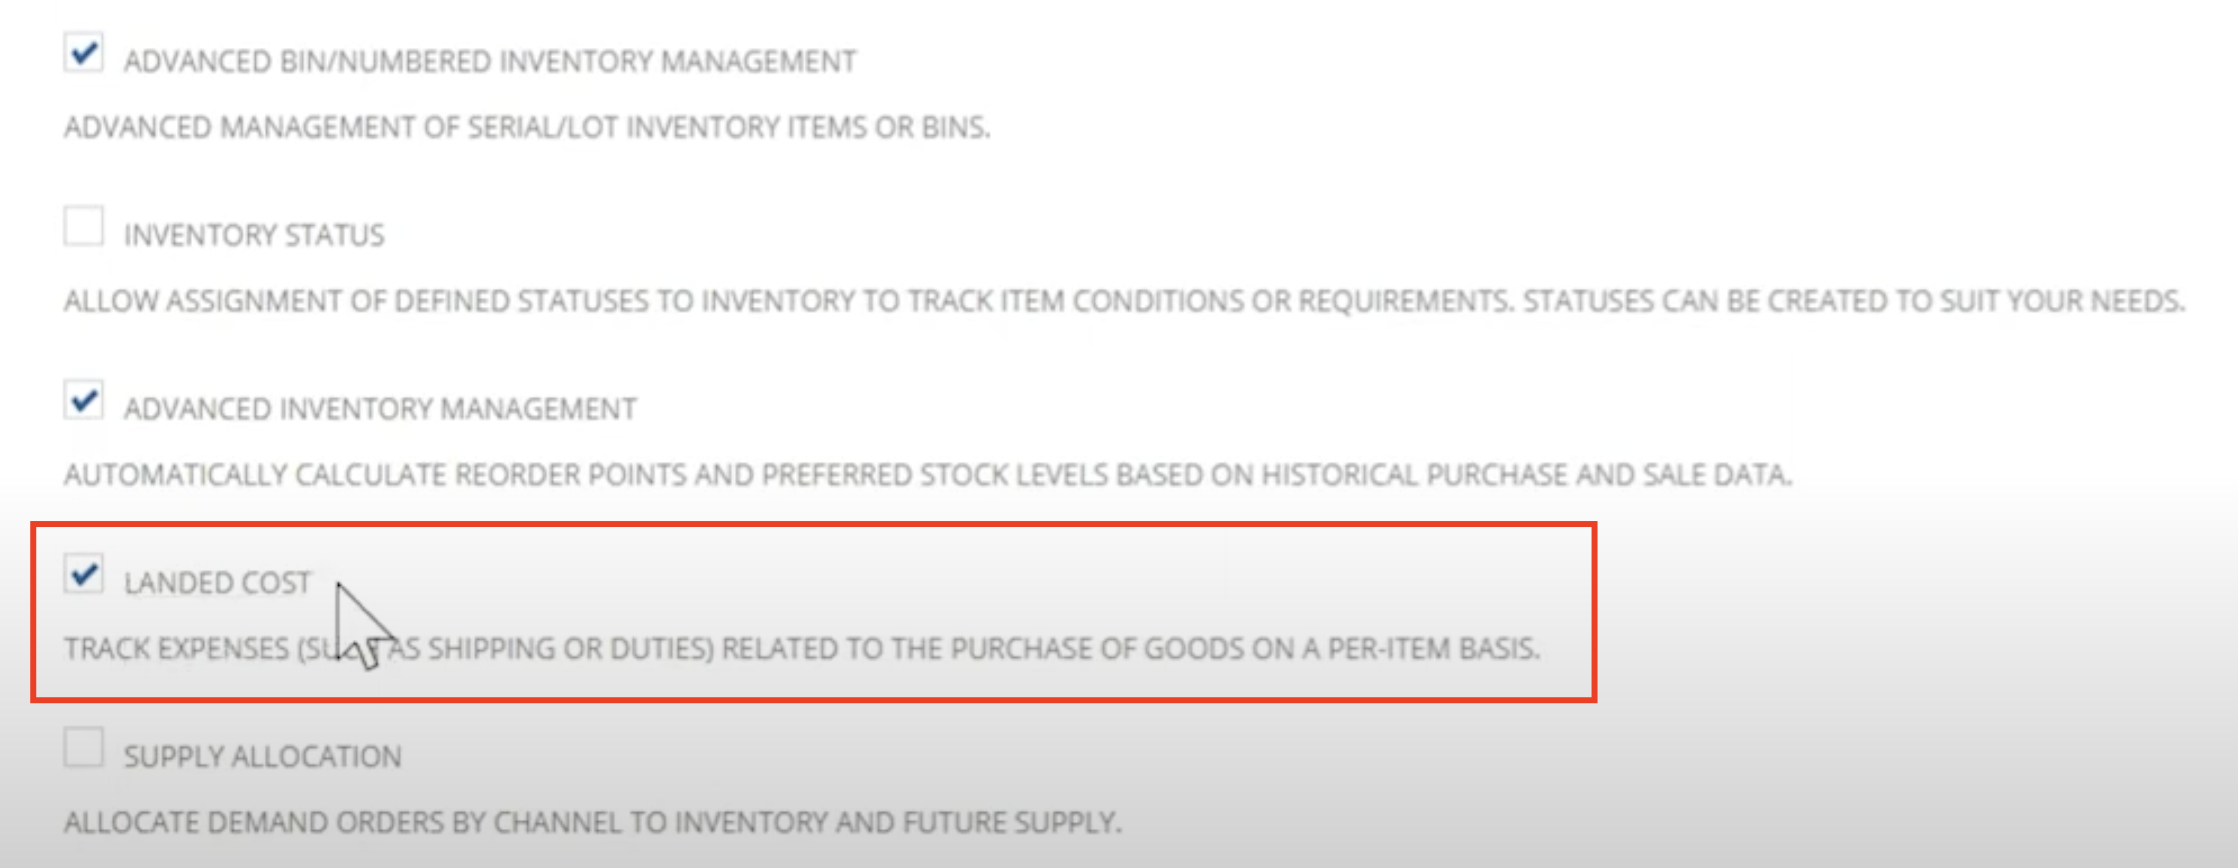
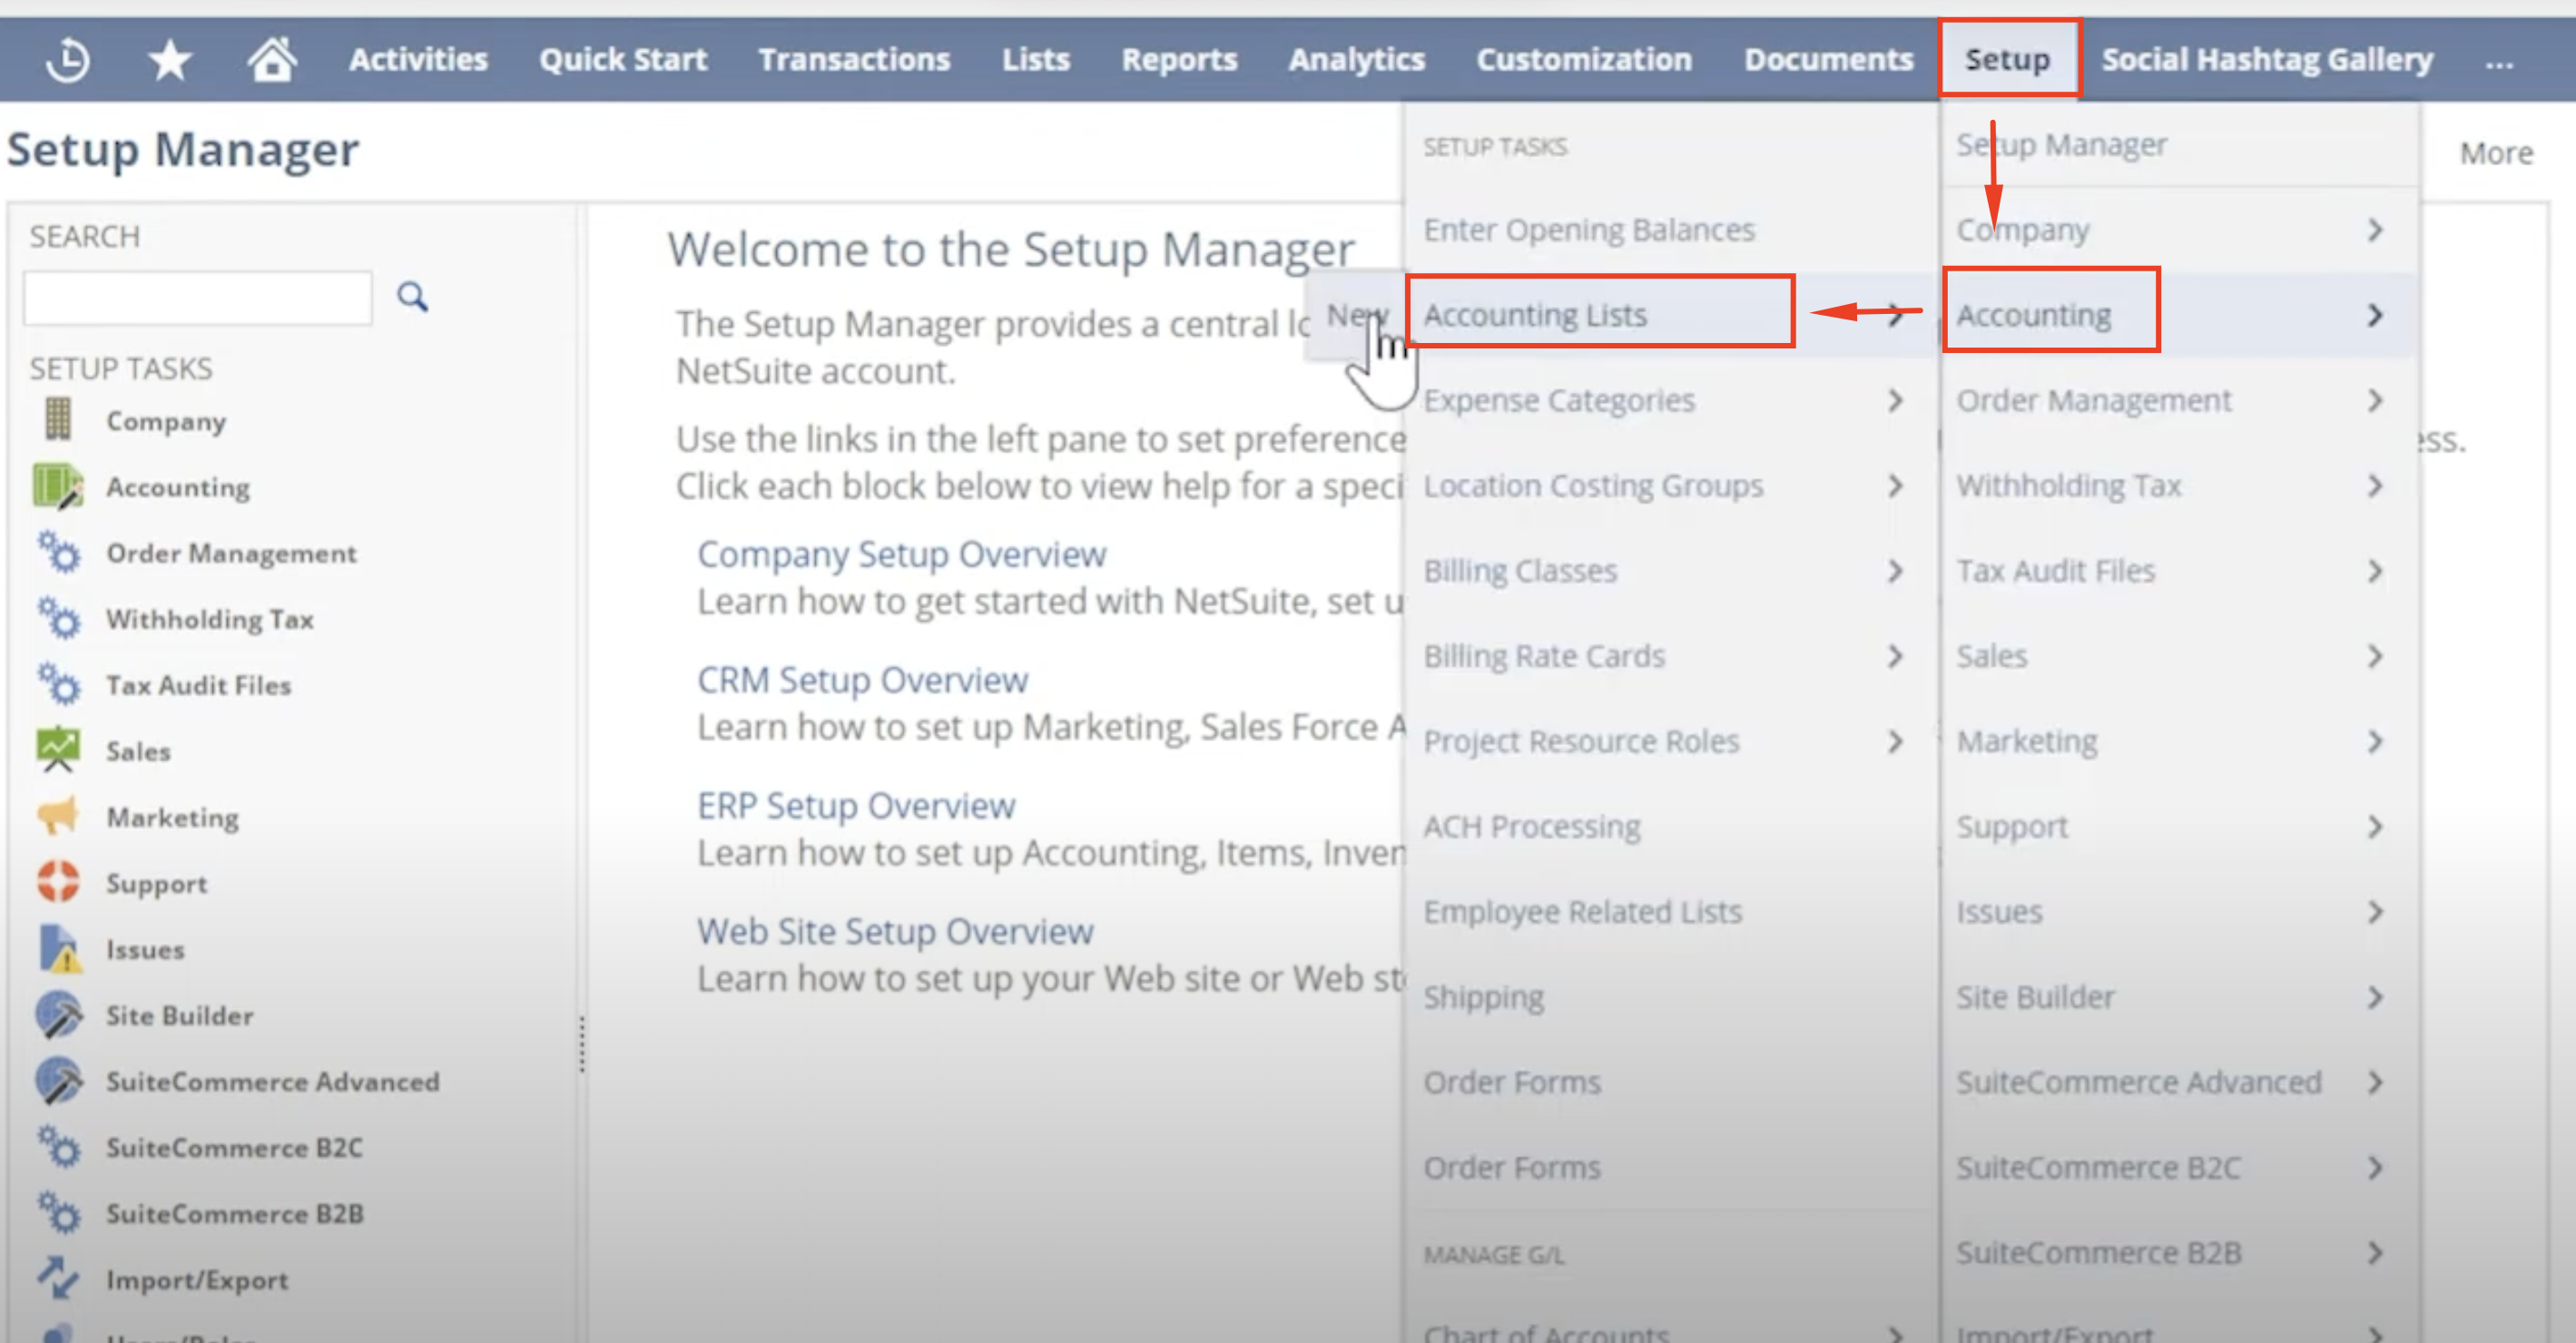
To begin using landed costs in NetSuite, you must first enable the feature. Here’s how to do it:
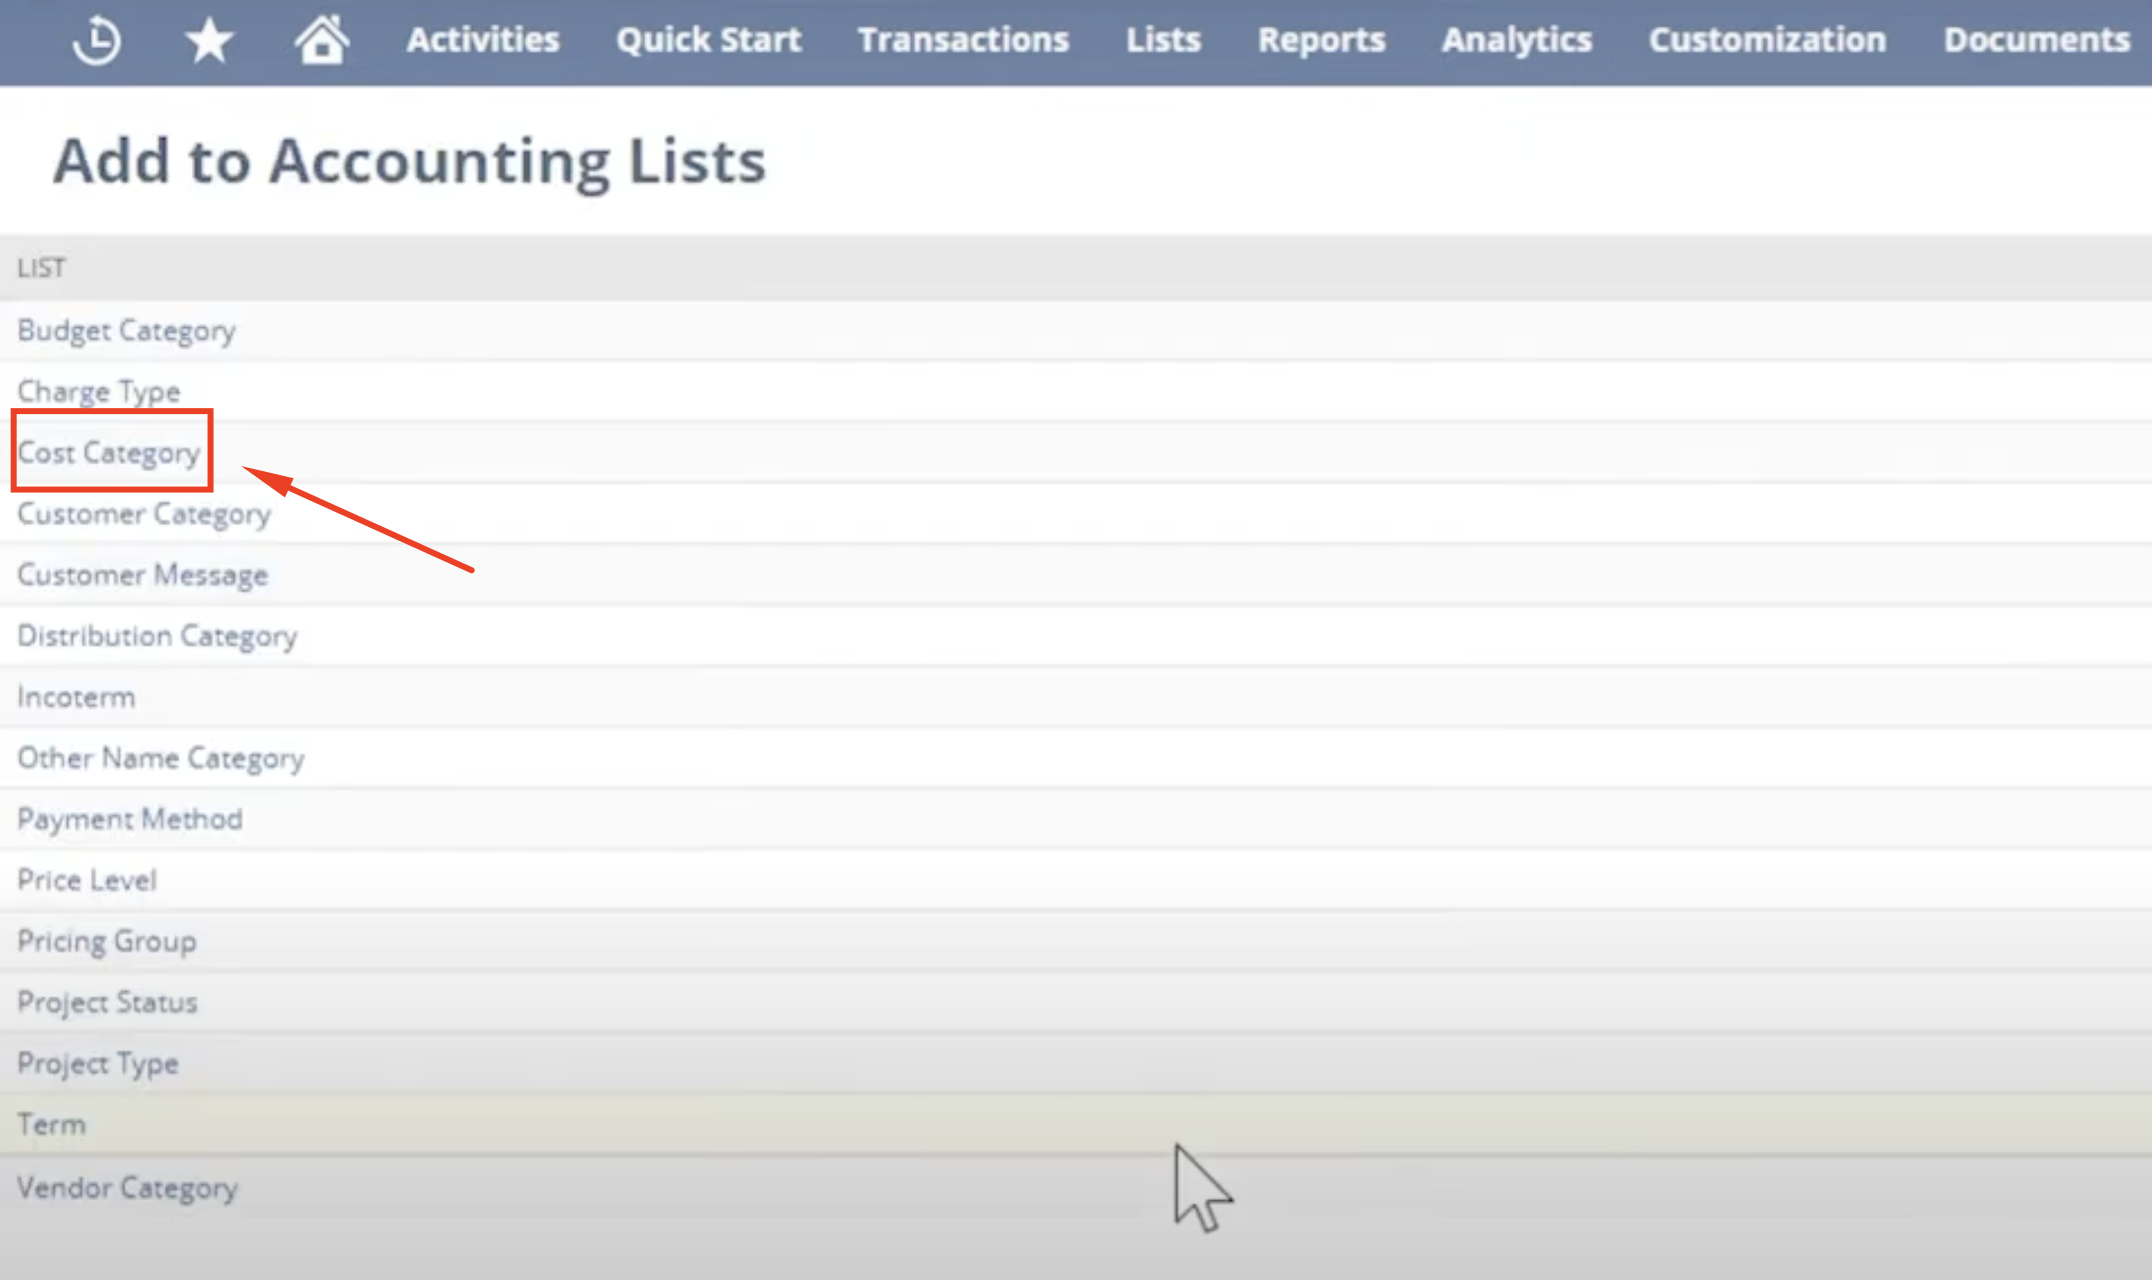
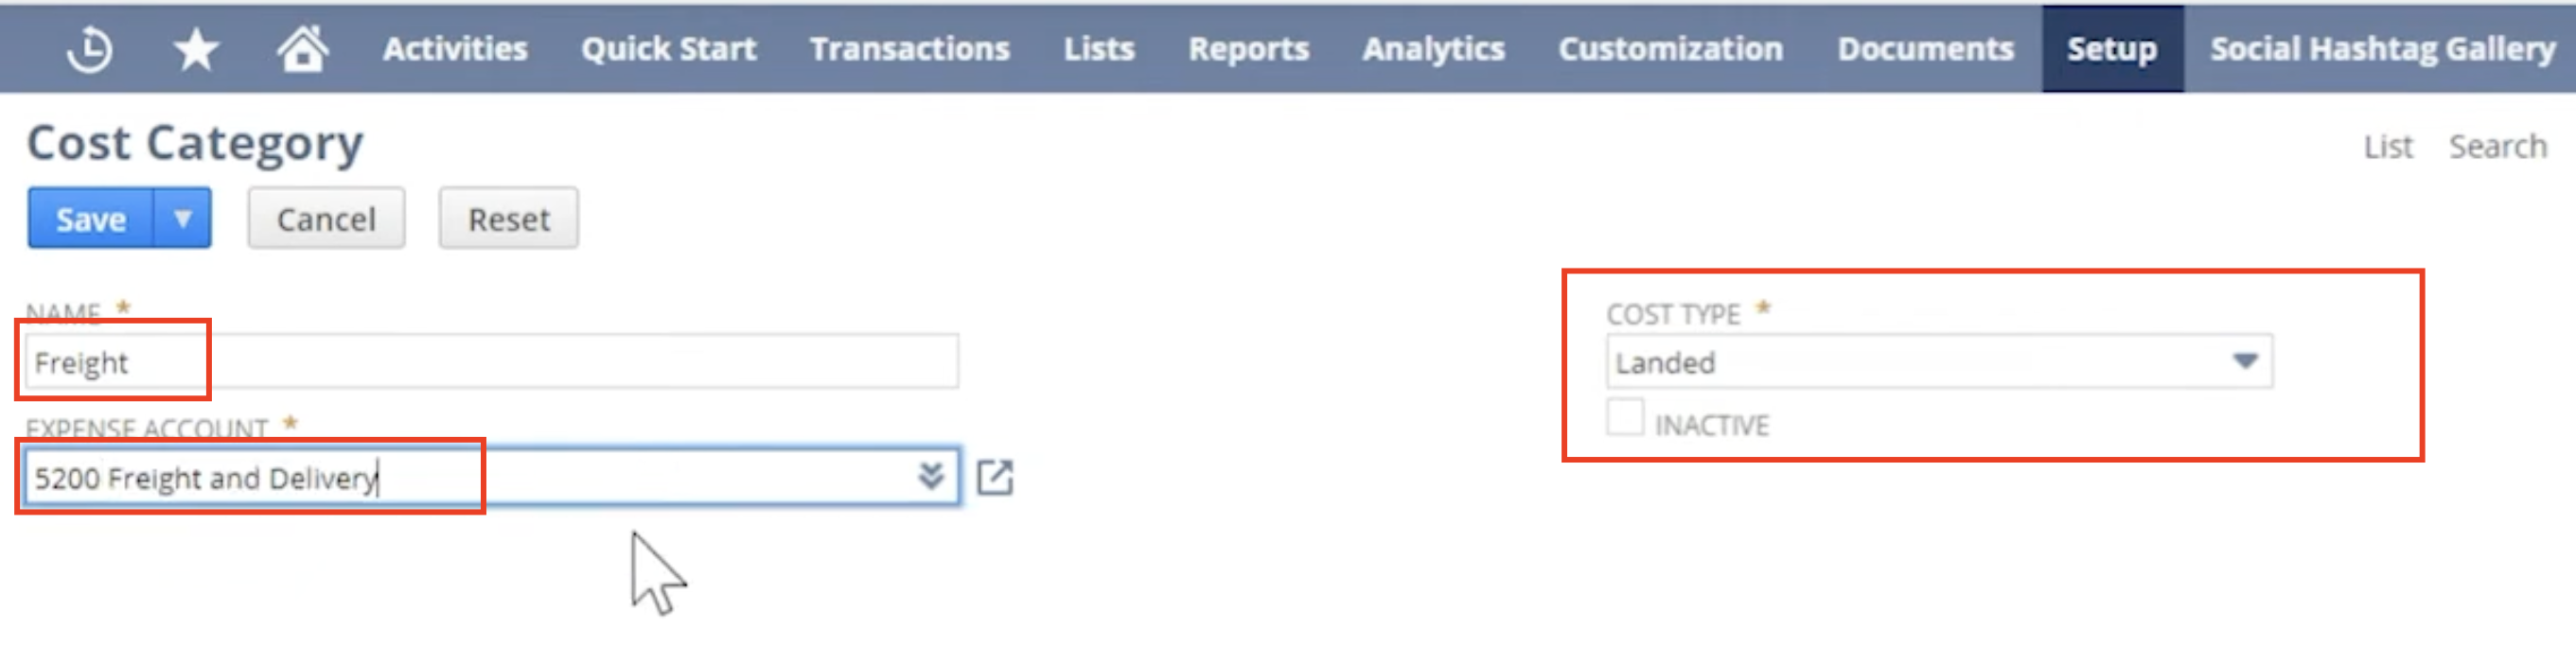
Next, you’ll need to create categories for your landed costs (e.g., shipping, taxes, customs duties). Here’s how you can configure them:
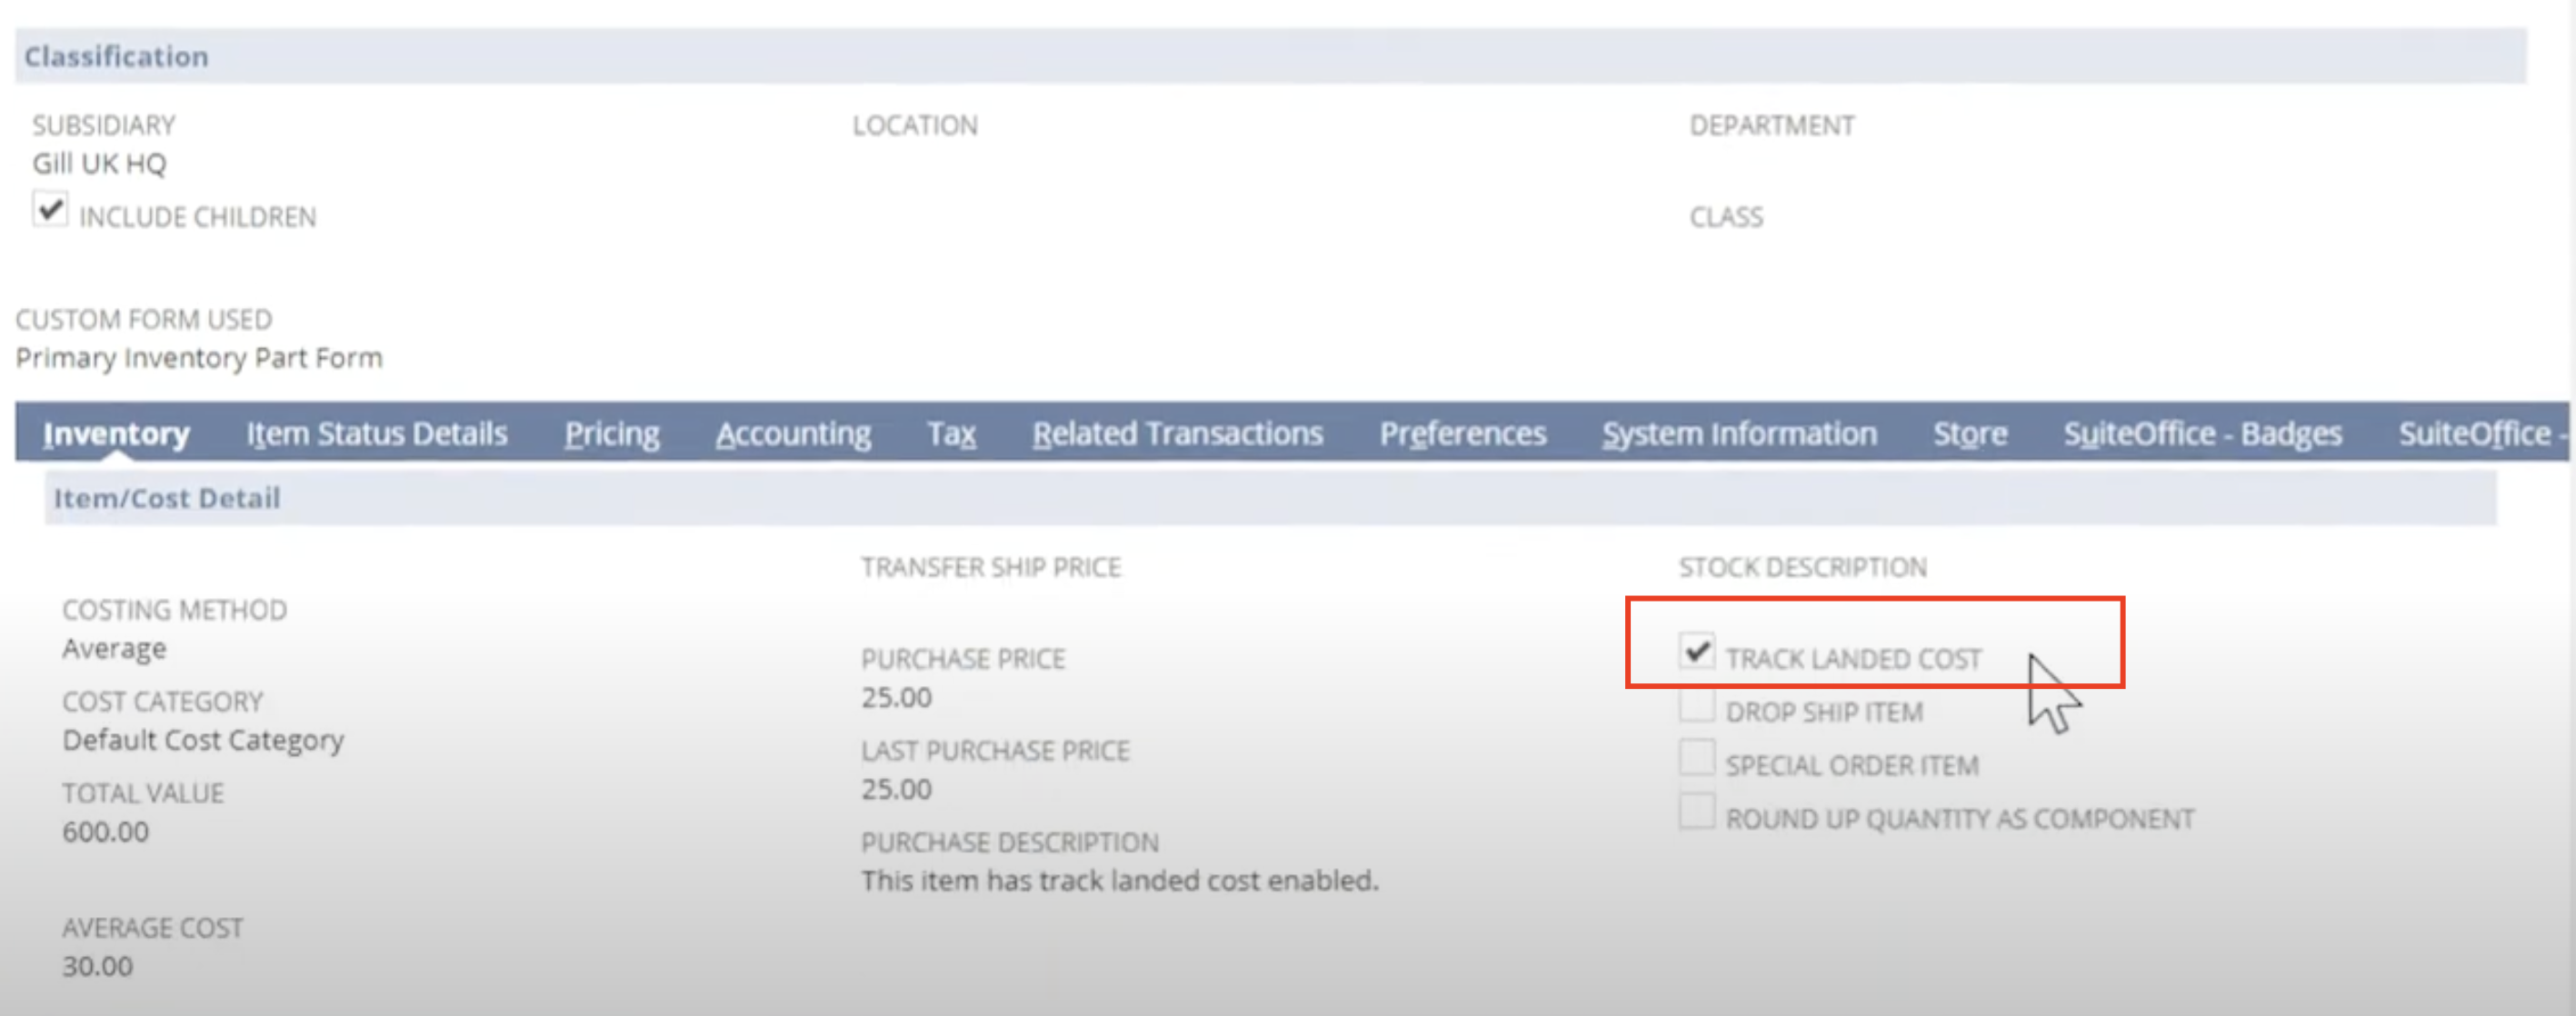
Finally, ensure that your item records are set to track and apply landed costs. Here’s how to do this:
Managing landed costs for international shipments can be tricky. You need to account for things like currency conversions, customs duties, and taxes, which vary by country. NetSuite helps simplify these processes.
Businesses engaged in global trade must account for additional landed costs, including:
NetSuite enables businesses to track these expenses and allocate them efficiently, ensuring compliance with international trade regulations and accurate financial reporting.
NetSuite allows you to estimate landed costs before goods arrive. This can help you plan ahead and budget for future expenses. You can create templates for recurring landed costs, like shipping and customs, so you’re prepared even before the product is received.
Once the goods are received, you can compare the actual costs with the estimates to make sure everything aligns. If there are discrepancies, you can adjust accordingly.
Here’s how to make the most of this feature:
NetSuite allows you to input estimated costs for items like shipping, customs, duties, or taxes even before the goods arrive. This gives you a clearer picture of your total expenses and helps avoid unexpected financial surprises.
For recurring expenses like shipping or customs, NetSuite lets you create templates to simplify the process. Templates ensure consistency and save time by automatically applying common landed costs to new transactions.
When the goods arrive, you can compare your estimates with the actual costs incurred. NetSuite allows you to adjust and reconcile these costs easily:
Managing landed costs can be challenging. Here are a few common issues businesses face and their solution with NetSuite:
| Challenge | Impact | NetSuite Solution |
|---|---|---|
| Complex Calculations | Costs involve multiple factors, making tracking difficult | Automated landed cost allocation |
| Manual Entry Errors | Incorrect allocations lead to reporting discrepancies | Predefined cost categories and templates |
| Inaccurate Financial Statements | Misallocated costs distort financial reports and tax filings | Real-time tracking and audit trails |
NetSuite solves these issues by automating cost allocation and integrating with your procurement and financial systems. This reduces the risk of errors and ensures accurate reporting.
Managing landed costs with NetSuite brings several benefits to your business:
Here are some tips to manage landed costs effectively:

Landed cost management is crucial for accurate financial reporting, pricing, and profit assessment. With NetSuite’s Landed Cost feature, you can easily track all associated costs, whether they’re local or international. By following this guide, you will understand your product costs better. This will help you make smarter choices and avoid expensive mistakes.
Our customer support team is available for help.