


Get In Touch
Our customer support team is available for help.
Let's Talk Business!
© Copyright 2026 @ ERP Peers


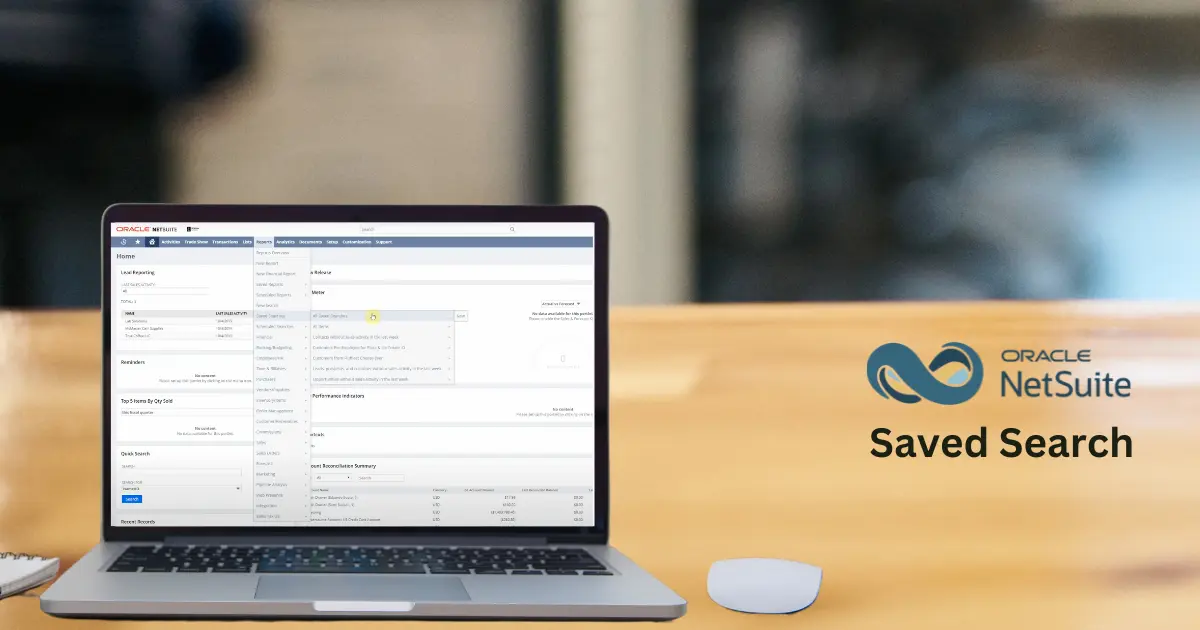
NetSuite Saved Searches are one of the platform’s most powerful tools, providing users with tailored views of their data. They allow businesses to analyze key metrics, extract insights, and make informed decisions. Understanding how to create, use, and optimize Saved Searches can transform how you manage and interpret your data.
A Saved Search in NetSuite is a reusable, customizable query that allows users to define filters, display preferences, and criteria for data analysis. It functions as a dynamic reporting tool, providing real-time insights tailored to specific business needs, such as lead tracking, sales analysis, and inventory management.
For additional insights, check out this comprehensive guide on NetSuite Saved Searches to understand the core concepts and benefits.
NetSuite Saved Searches work by generating a query based on user-defined filters and criteria. The backend system constructs this query, retrieves matching records from the database in real-time, and optimizes performance for large datasets. The results are dynamically generated and returned to the user with the specified fields and conditions applied.
Saved searches in NetSuite are powerful tools for extracting specific data from your system. This detailed guide ensures you don’t miss any steps while setting up your search.
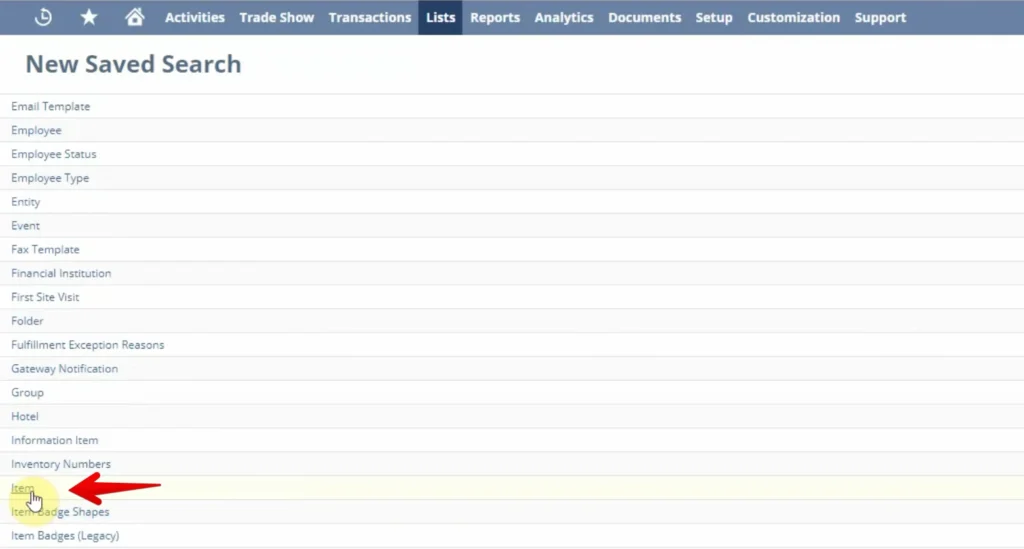
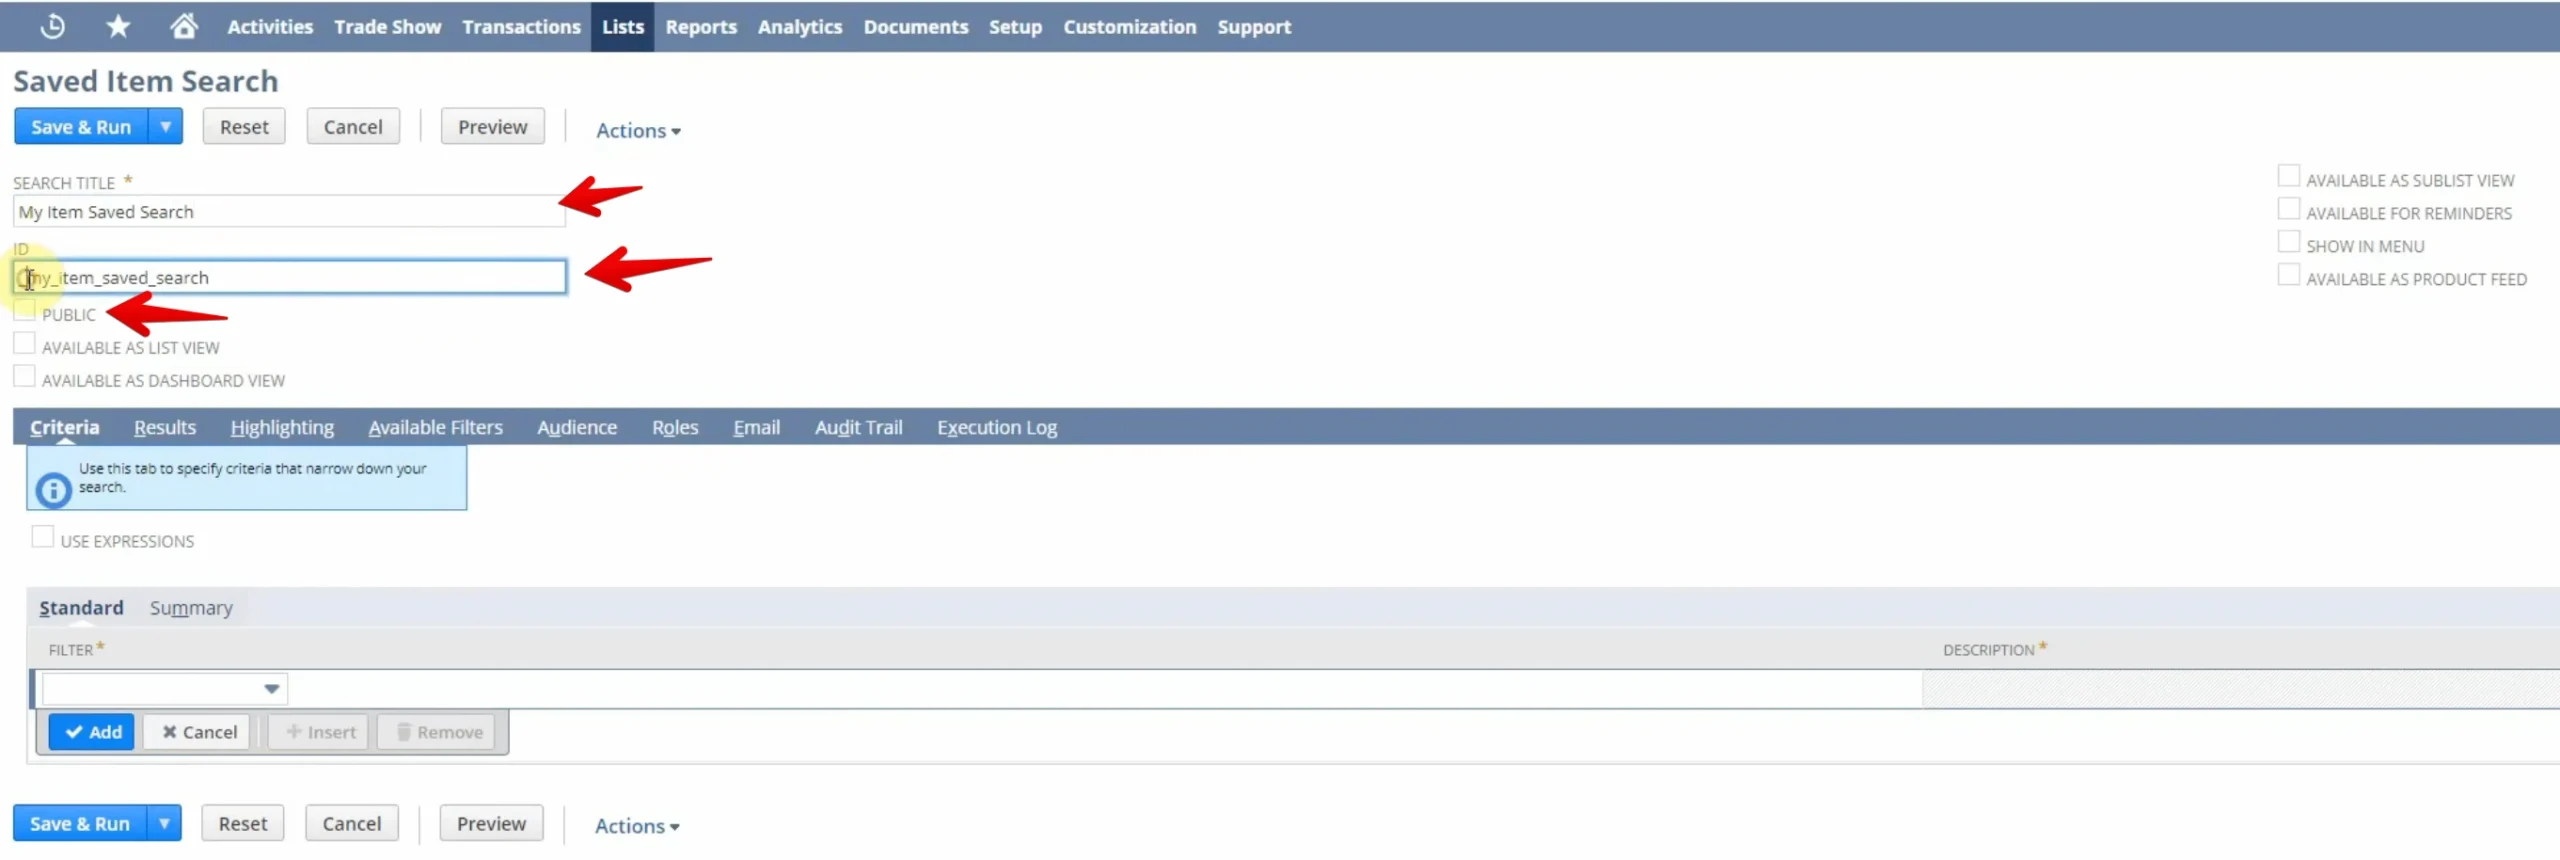
Start by entering a search title. For this example, we’ll use “My Item Saved Search.”
NetSuite will automatically assign an ID to your saved search if you don’t create one, but it’s recommended to manually assign an ID for easy recognition.
If you want the Saved Search to be available to all users, check the ‘Public’ checkbox. To display the search as a list (e.g., in a portlet on your dashboard), check the ‘Available as List View’ checkbox.
Criteria are all the rules you set to filter your data, ensuring that only the information you want is returned. For example, if you run an Item Saved Search without setting criteria, it will return all items in NetSuite. To avoid this, you’ll set filters to narrow down the results based on specific conditions.
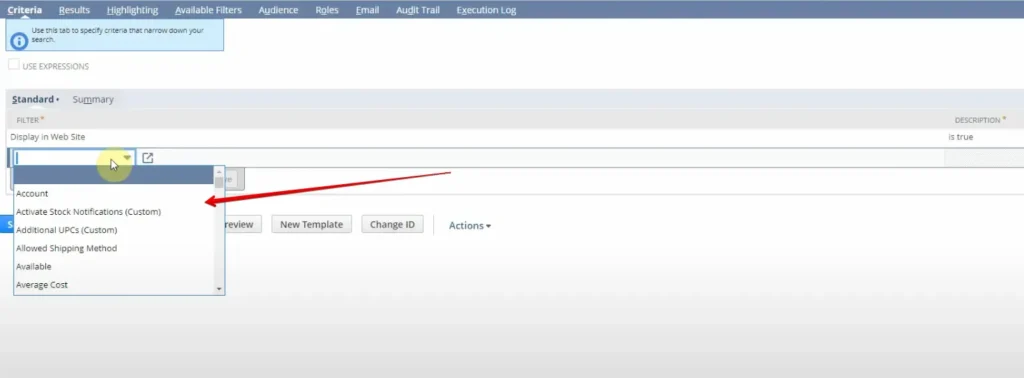
The first step is to define the type of item you want the saved search to return. On the Criteria tab, under the Filter subtab, you’ll find an option for Type.
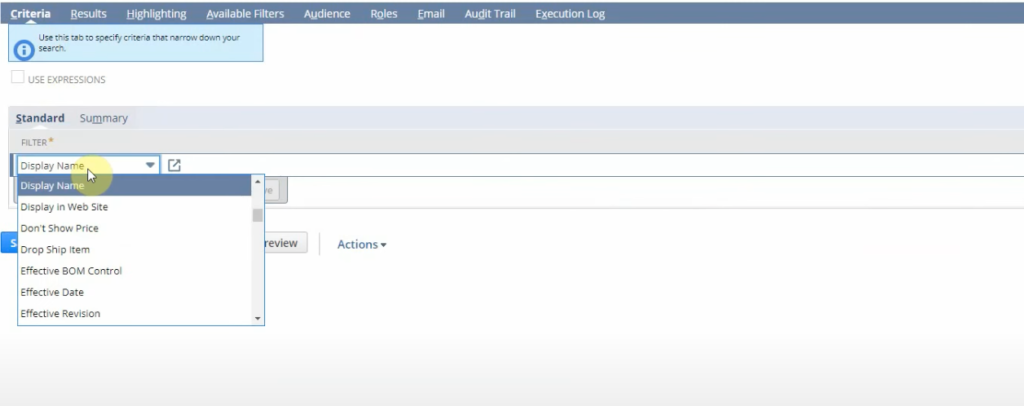
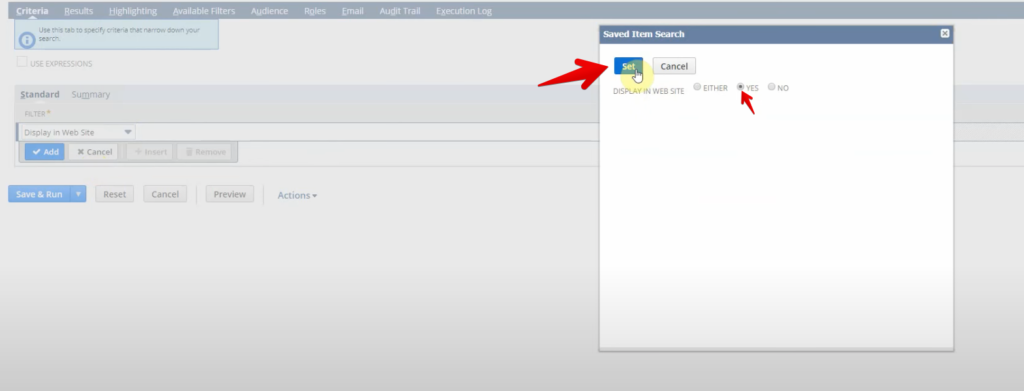
Now, to filter down items that are shown on your website, for example, go to Display in Website (a checkbox field), and set it to “Yes.” This will filter the search to return only those items that are visible on the website. If you want to combine multiple conditions, you can use expressions (AND, OR) to create complex filter rules.

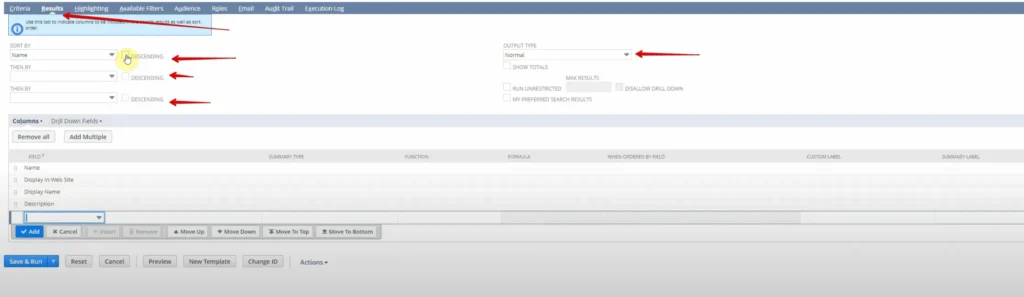
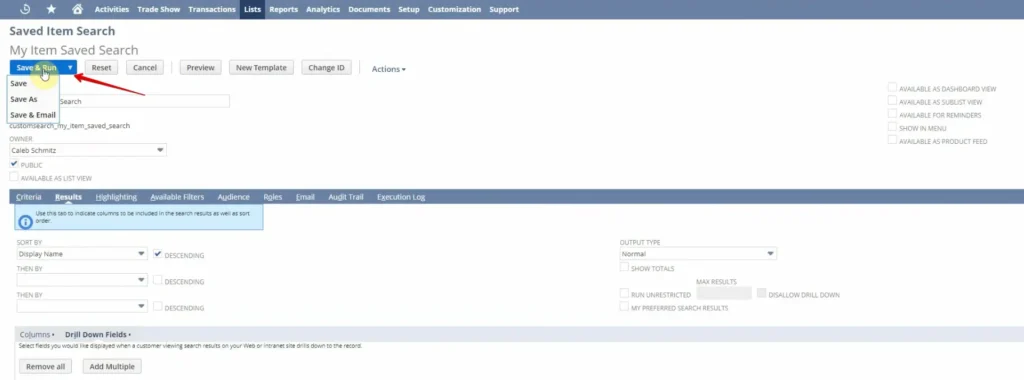
Once you’ve set your criteria, it’s time to move to the Results tab, where you can define the columns to display in your saved search results. This is where you configure what data to show.

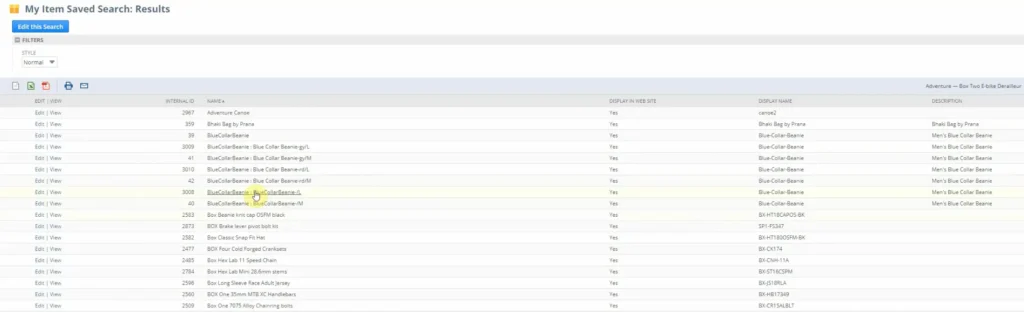
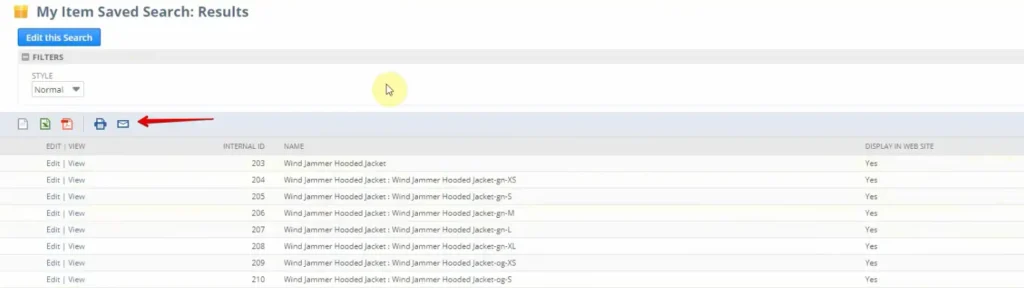
Below is Result of Saved Search:
The formula feature allows you to use SQL logic for more powerful searches. Here’s how to use it:
For example, if you want to display the backordered ID for items, you can use a formula like
CASE WHEN {transaction.quantity} < {transaction.quantityonhand} THEN 'Backordered' ELSE 'In Stock' END
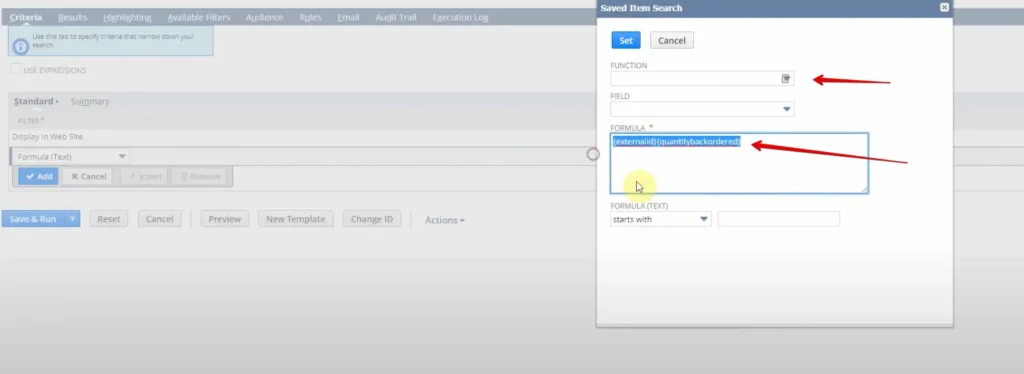
You can explore more formulas and examples using SuiteAnswers, which contains detailed examples of SQL syntax and advanced formula configurations.
Once your search is configured with the necessary criteria, display settings, formulas, and drill-downs, click Save to save the search.
After running the saved search, you can export the data for further manipulation:

1. Go to Your Dashboard -> Personalize It:
2. Add Custom Search Portlet:
3. Set Up the Search:
4. Configure Results & Behavior:
5. Enable Inline Editing (Optional):
6. Save Your Changes:
To ensure dashboard searches are optimized, secure, and truly role-specific, our NetSuite saved search services help businesses design, fine-tune, and maintain high-impact searches—without relying on internal trial and error.
Here’s a refined list of the top most commonly used NetSuite Saved Search types, which are essential for various business functions:
| Customer Search | Used for managing customer data, tracking sales performance, and supporting targeted marketing campaigns. |
| Item Search | Generates reports on products and services, including pricing, stock levels, and sales performance. |
| Opportunity Search | Tracks potential sales and forecasts revenue, analyzing sales performance by lead source or industry. |
| Transaction Search | Essential for financial management, tracking sales orders, purchase orders, invoicing, and cash flow. |
| Vendor Search | Helps manage vendor relationships, analyzing purchase history, payment terms, and vendor performance. |
| Employee Search | Used by HR departments to manage employee data such as departments, roles, compensation, and performance metrics. |
| Lead Search | Focused on managing and analyzing leads through the sales funnel, tracking conversion rates and sources. |
| Project Search | Used for tracking project status, budgets, deadlines, and resources, ensuring projects are on time and within budget. |
| Marketing Campaign Search | Tracks the effectiveness of marketing campaigns, measuring lead generation, conversion rates, and ROI. |
Here are some best practices for NetSuite Saved Searches:
| Use Case | Real-Life Conditions / Examples |
|---|
| Sales Analysis | A sales manager wants to analyze the sales performance of each representative by region or product category. They can use a Saved Search to generate monthly performance reports and identify top performers and trends in sales. |
| Customer Segmentation | A marketing team needs to target customers based on their location, purchasing history, or industry for an upcoming promotional campaign. They use a Saved Search to filter customers into relevant groups based on these criteria. |
| Inventory Control | A retail company needs to manage stock levels across multiple warehouses. They create a Saved Search to monitor low-stock items, identify slow-moving inventory, and manage reordering to optimize warehouse space. |
| Financial Insights | A CFO needs to generate financial statements, track the accounts receivable and payable, and review the company’s monthly cash flow. A Saved Search helps them access specific financial transactions like invoices, payments, and outstanding balances. |
| Lead Tracking | A sales manager wants to evaluate the effectiveness of lead generation channels, such as online forms or referrals. They use a Saved Search to track the lead status, lead source, and conversion rates, allowing them to adjust strategies. |
| Project Monitoring | A project manager needs to track the progress of a software development project. They use a Saved Search to monitor key metrics like budget, timeline, resource allocation, and tasks completion to ensure the project is on track. |
| Employee Management | HR departments use Saved Searches to evaluate employee performance metrics across departments. For example, a Saved Search can track employee tasks, attendance, and productivity, helping managers assess employee effectiveness and workload balance. |
| Vendor Performance | A purchasing manager wants to evaluate vendor performance based on delivery times, payment terms, and quality. They use a Saved Search to generate reports comparing vendors and make data-driven decisions about future supplier relationships. |
| Customer Service Analysis | A customer service team needs to track the number of open cases, average resolution time, and customer satisfaction scores. Saved Searches help analyze patterns in service cases, identify areas for improvement, and monitor support staff performance. |
| Expense Management | An accounting department uses Saved Searches to track employee expense reports, including receipts and approvals. For example, they can create a Saved Search to monitor travel expenses or office supply reimbursements, ensuring compliance with company policies. |

NetSuite Saved Searches empower businesses to harness their data efficiently. By creating personalized searches, defining precise criteria, and adhering to best practices, you can unlock the full potential of this powerful tool. Whether for reporting, inventory, or other use cases, Saved Searches provide actionable insights to improve business outcomes. Start building smarter searches today to make decisions driven by data, not guesswork. For further learning, the NetSuite Release Notes for 2024 detail updates and enhancements to Saved Searches.
This process allows you to create a duplicate of an existing Saved Search while keeping the original intact for future use or modification.
This will make the Saved Search available to all users within your organization or as specified by your sharing settings. Public Saved Searches can be accessed by any user without the need for specific permissions.
Our customer support team is available for help.