The Procure-to-Pay (P2P) process is essential for managing procurement and payables in businesses. By streamlining these processes, NetSuite helps reduce errors, enhance visibility, and improve financial accuracy. Automating P2P processes in NetSuite brings substantial benefits, including time savings, cost control, and better decision-making.
What is Procure to Pay (P2P) in NetSuite?
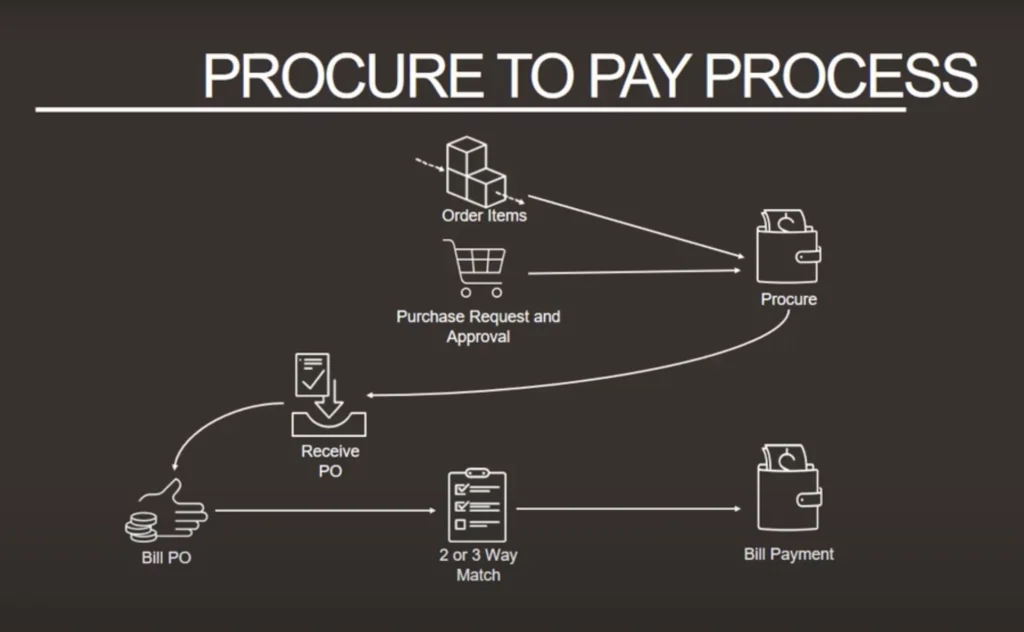
The Procure-to-Pay (P2P) cycle in NetSuite covers the whole process of managing procurement and payables in businesses. It starts with finding a need for goods or services. Then, it ends with processing payments to vendors.
NetSuite’s P2P module automates tasks that businesses usually do manually. It provides real-time visibility and connects inventory management. It also links purchase orders with financial data. This automation reduces errors, speeds up the process, and ensures timely payments, contributing to more accurate financial reporti

Key Features of NetSuite’s P2P Module
- Automated Purchase Order Creation: The system creates purchase orders (PO) automatically. This happens based on requests from departments. It ensures that all approvals and information are ready before making orders.
- Vendor Management and Sourcing: NetSuite helps you track suppliers and manage contracts. It also improves buying strategies using supplier ratings and past data.
- Three-Way Matching: NetSuite checks and matches purchase orders, receipts, and invoices. This ensures that the ordered items, received items, and billed amounts are accurate.
- Approval workflows: based on roles help ensure that all purchase orders receive proper approval before processing. This minimizes unauthorized spending and keeps financial controls in place.
- Real-Time Data and Reporting: Managers and decision-makers can access real-time procurement data. This helps them make smart choices about budgeting, cash flow, and vendor management.
Step-by-Step Guide to Step up Procure-to-Pay Process In NetSuite
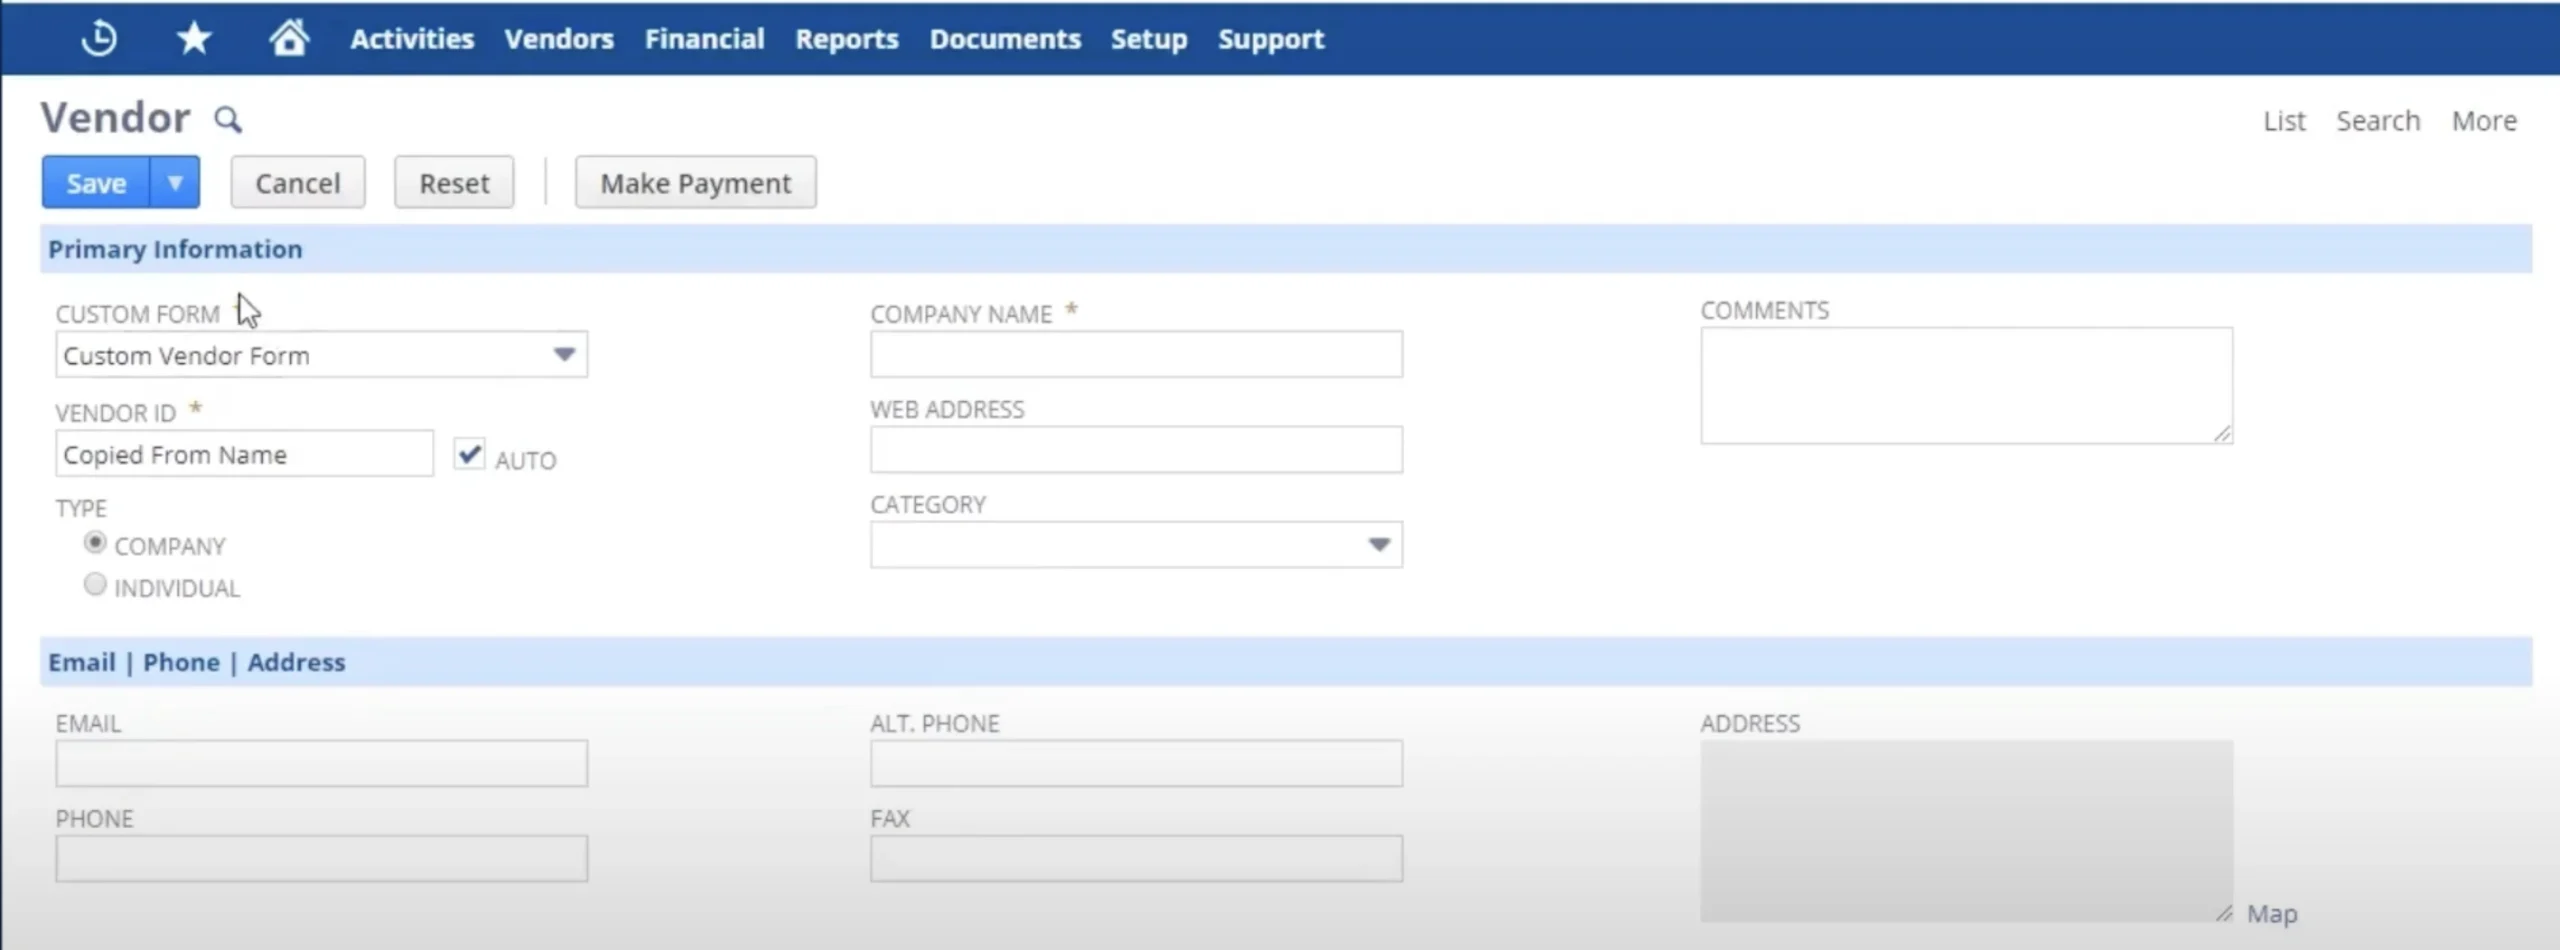
Step 1: Set Up Your Vendor
Before proceeding with the Procure-to-Pay process, you need to set up your vendors in NetSuite.
- Navigate to: Lists > Relationship > Vendor > New
- Required Fields:
- Company Name (Identify the vendor)
- Contact Information (For communication purposes)
- Address and Payment Terms (Optional but recommended)
Creating a vendor is essential for associating the vendor with subsequent procurement activities like requisitions, purchase orders, and invoices.

Step 2: Create Items for Procurement
Once the vendor is set up, you’ll need to create items that will be purchased.
- Navigate to: Lists > Accounting > Items > New
- Required Fields:
- Item Name and Number (Unique identifiers for easy tracking)
- Vendor (Select the vendor linked to the item)
- Tax Schedule (Specify applicable taxes)
You can create both inventory and non-inventory items. When selecting the vendor in the item form, the vendor’s information will be automatically linked to your requisitions.

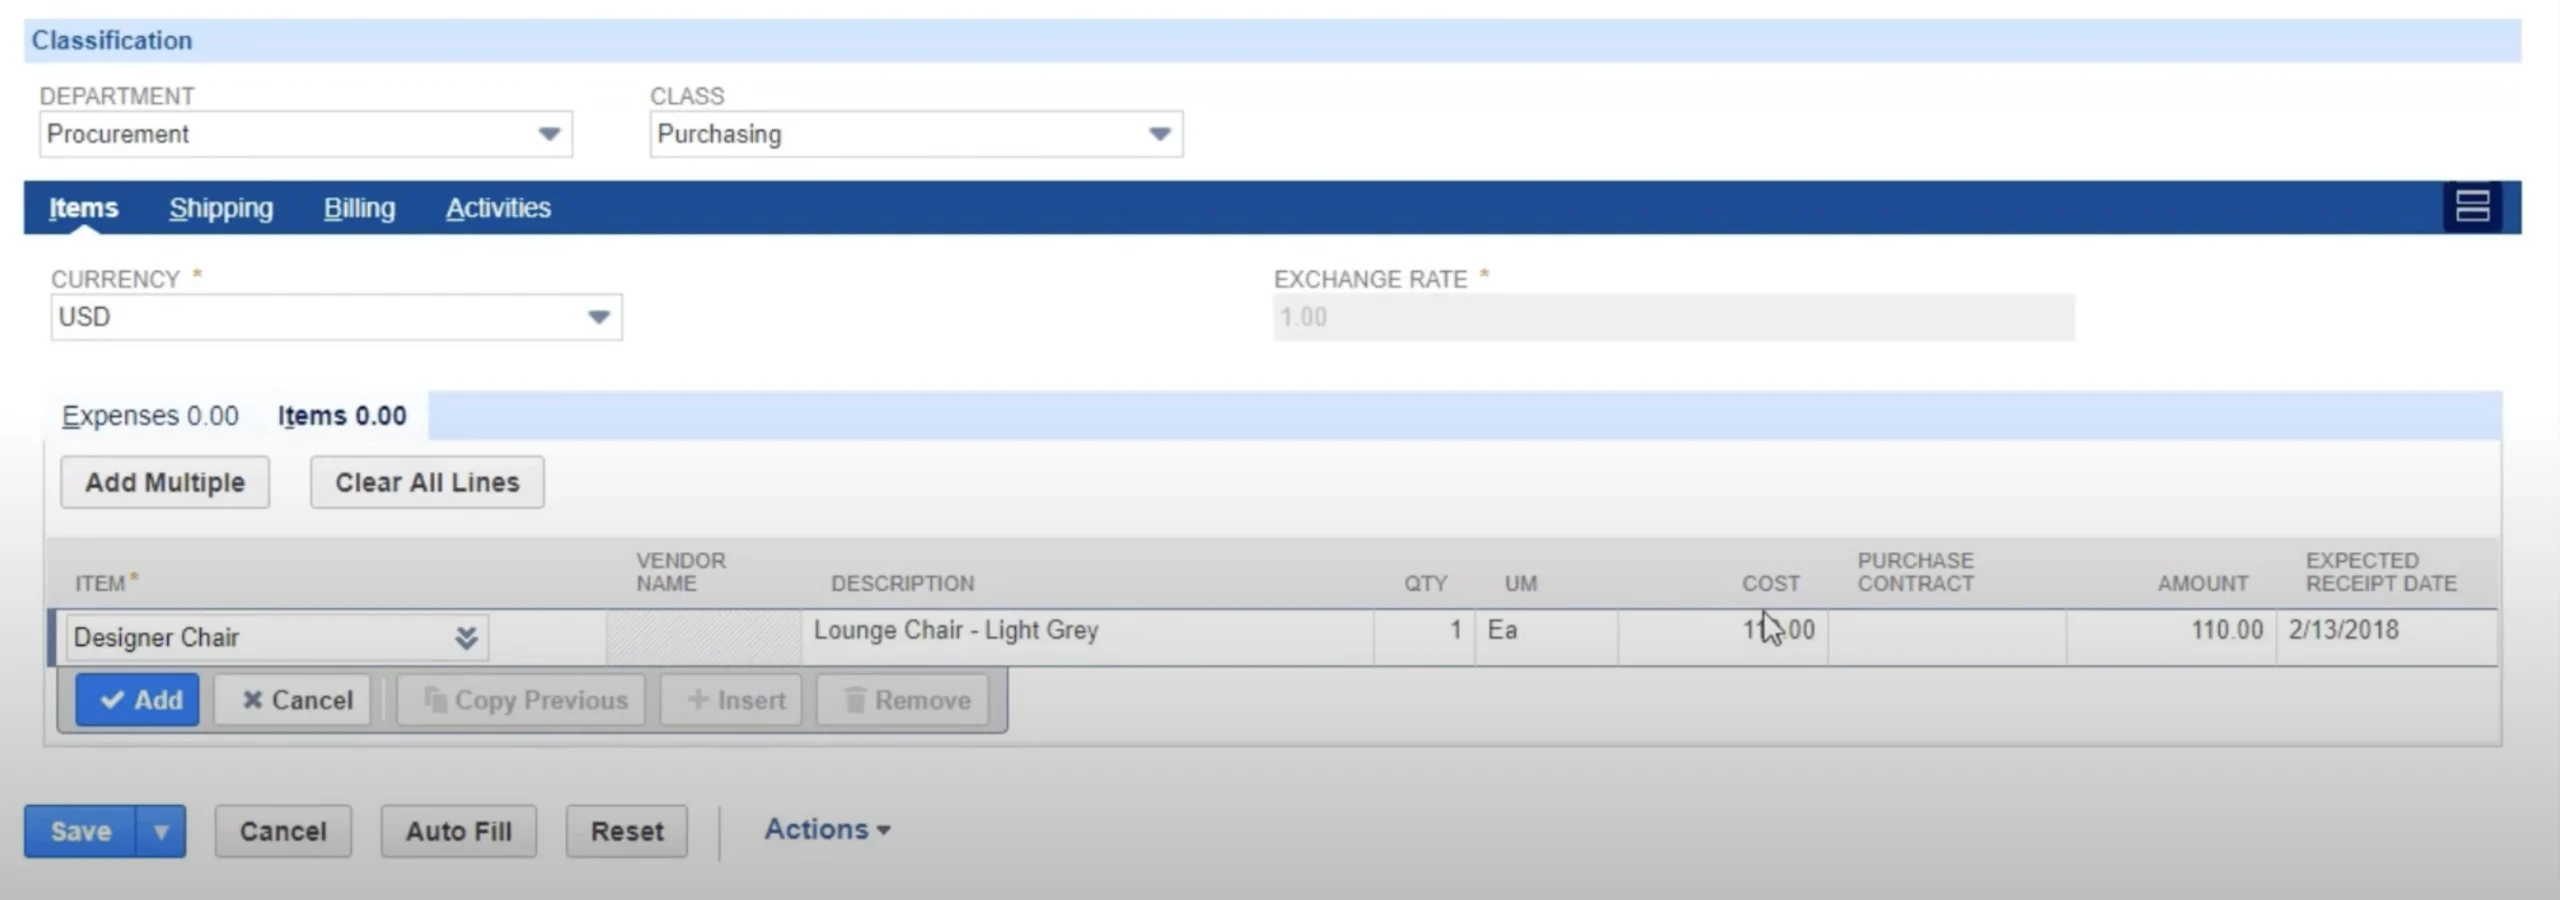
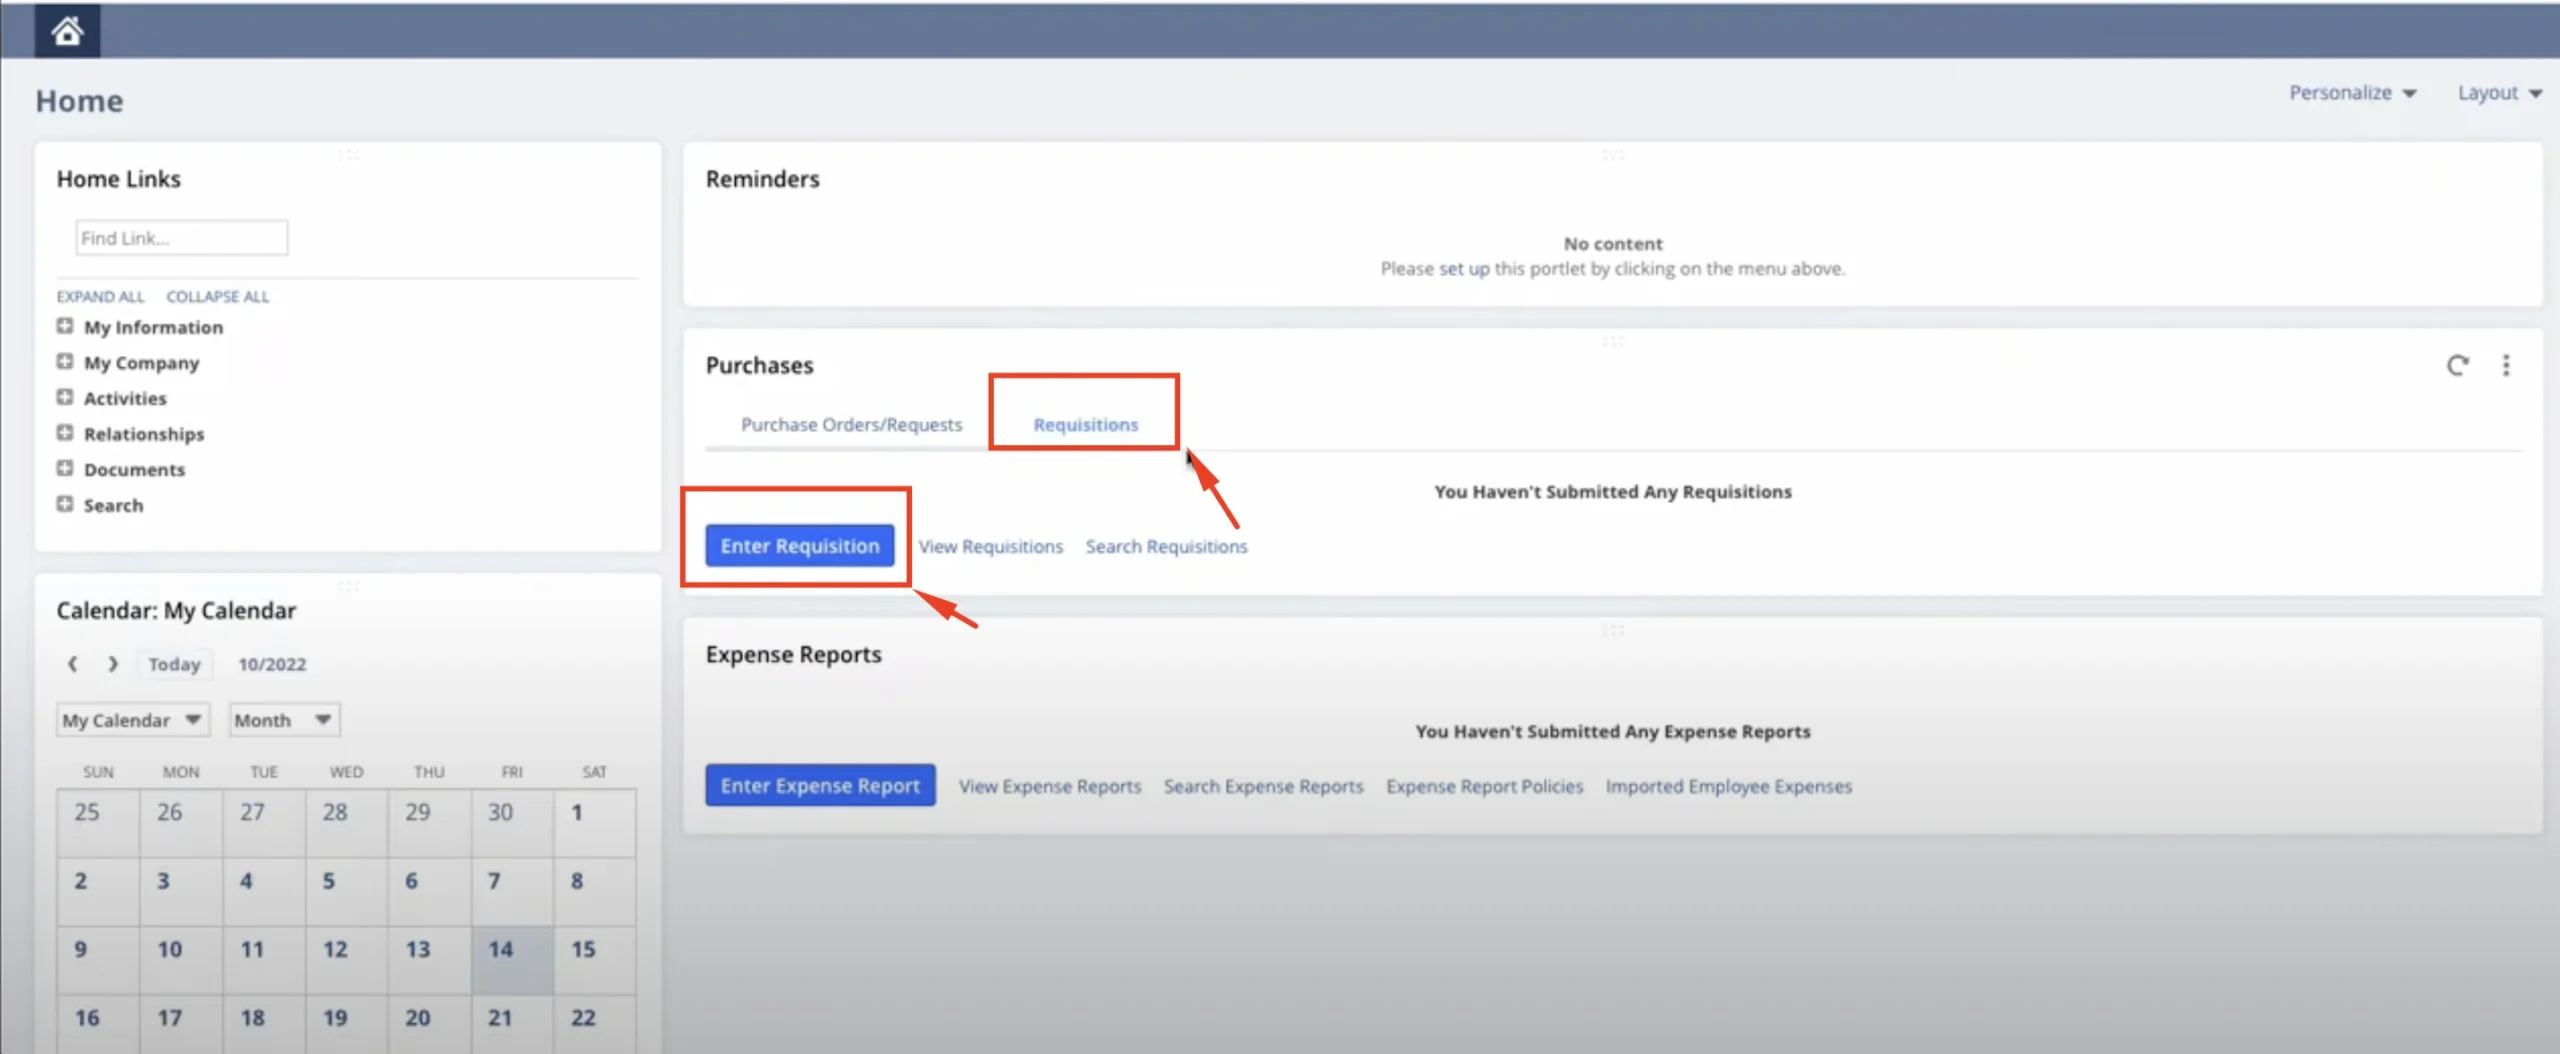
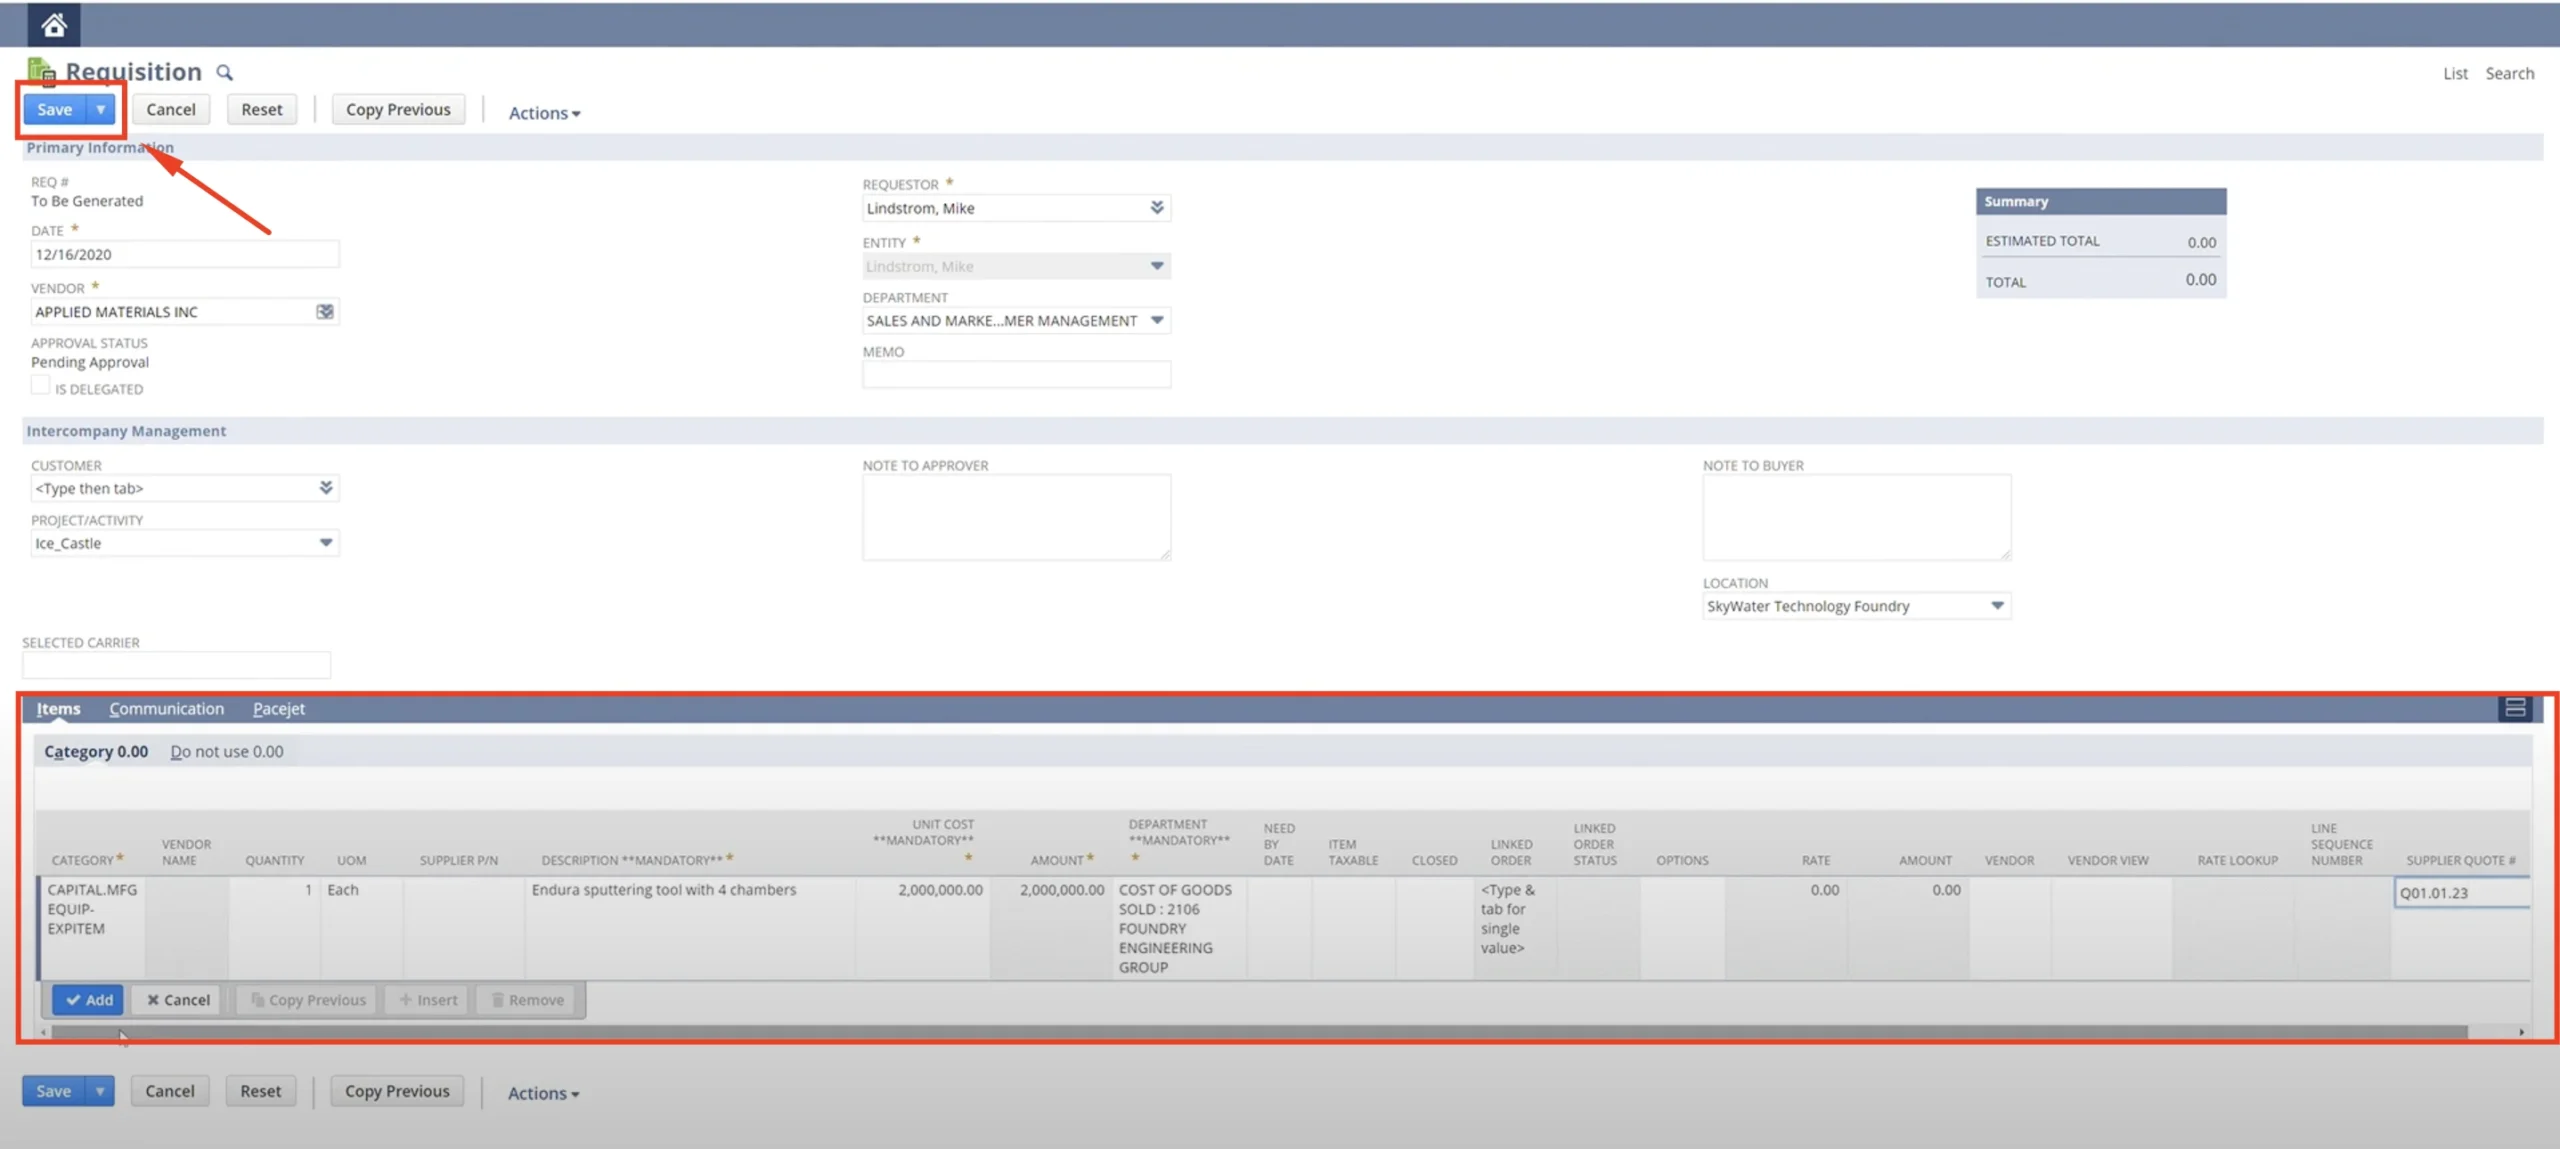
Step 3: Create a Purchase Requisition
A requisition is an internal request for goods or services that will initiate the procurement process.
- Navigate to: Transactions > Purchases > Enter Requisition > New
- Required Fields:
- Requestor (Who is requesting the item?)
- Date (Date of the request)
- Item (Select the item being requested)
- Department (Where the request is coming from)
After submission, the requisition will be pending approval. Once approved, the requisition will move forward in the purchasing process.


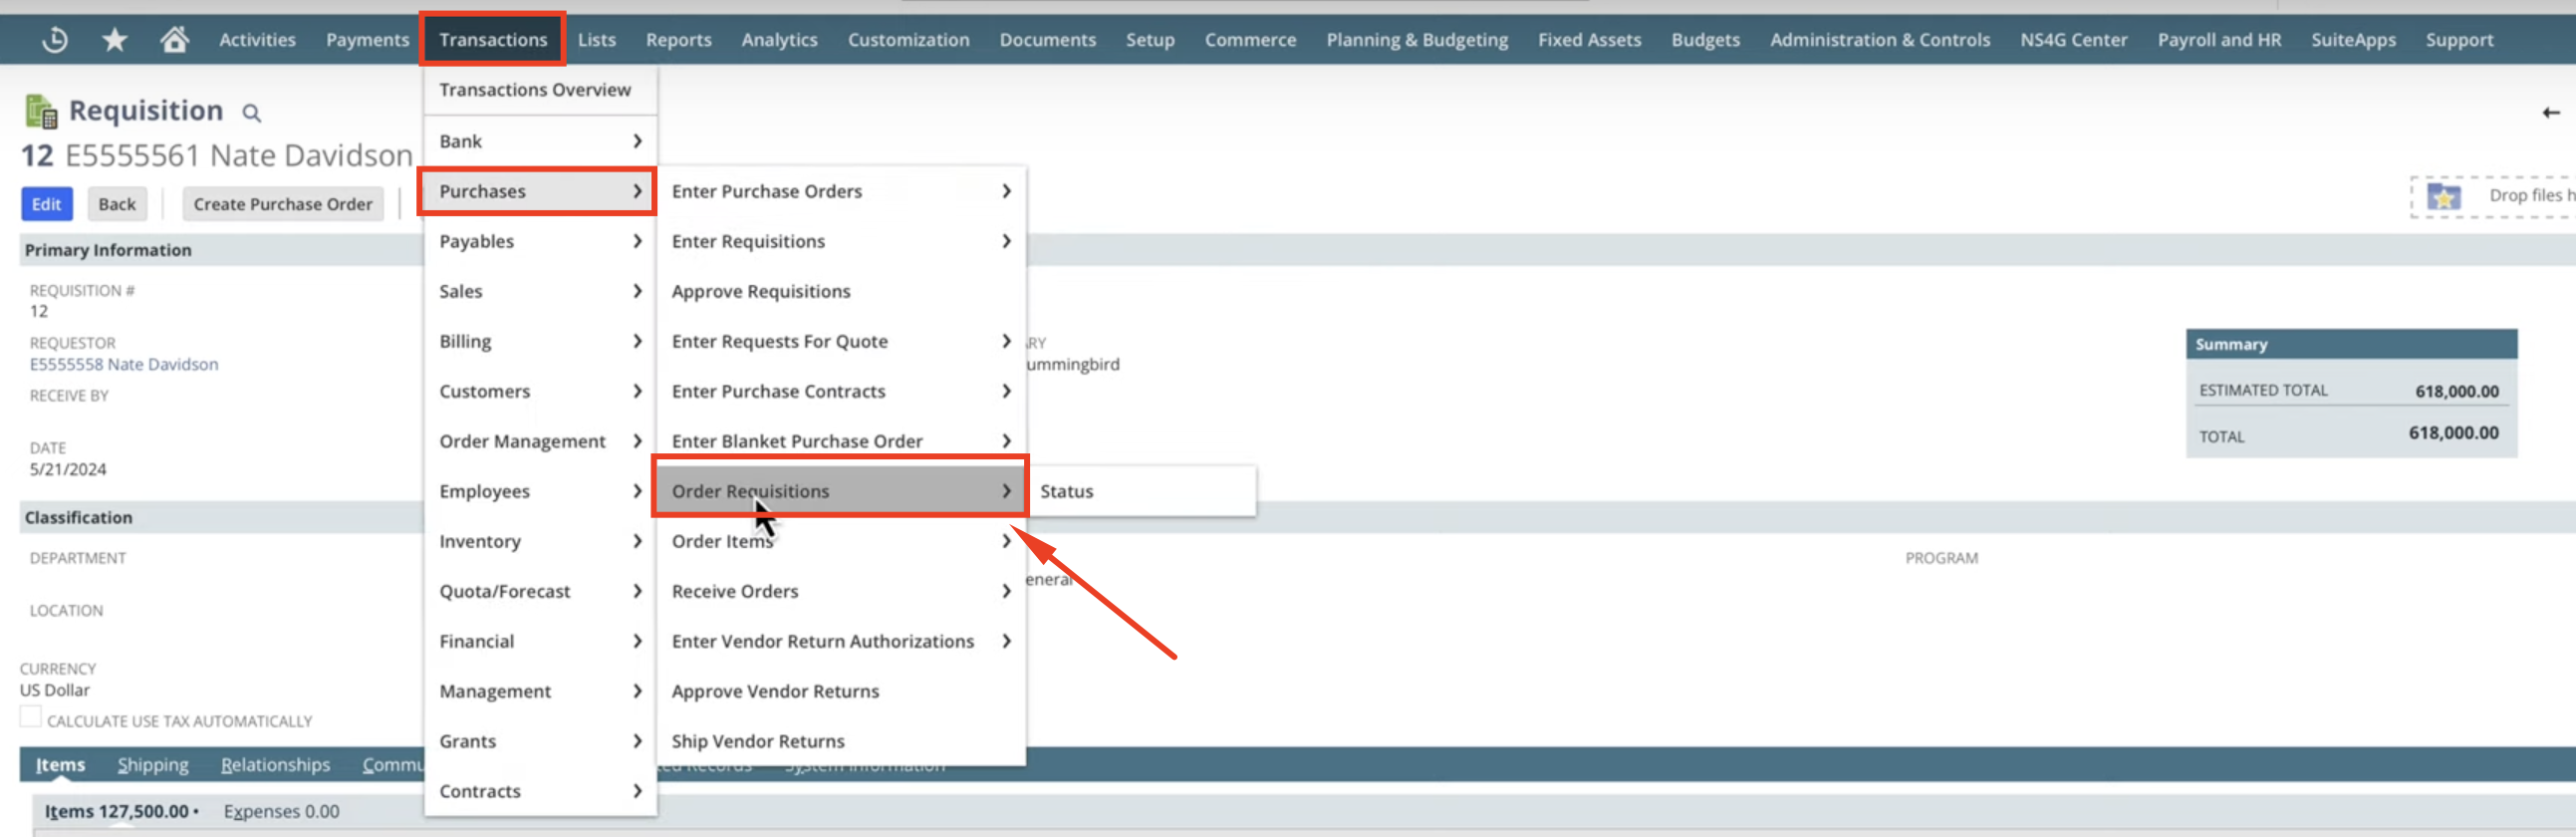
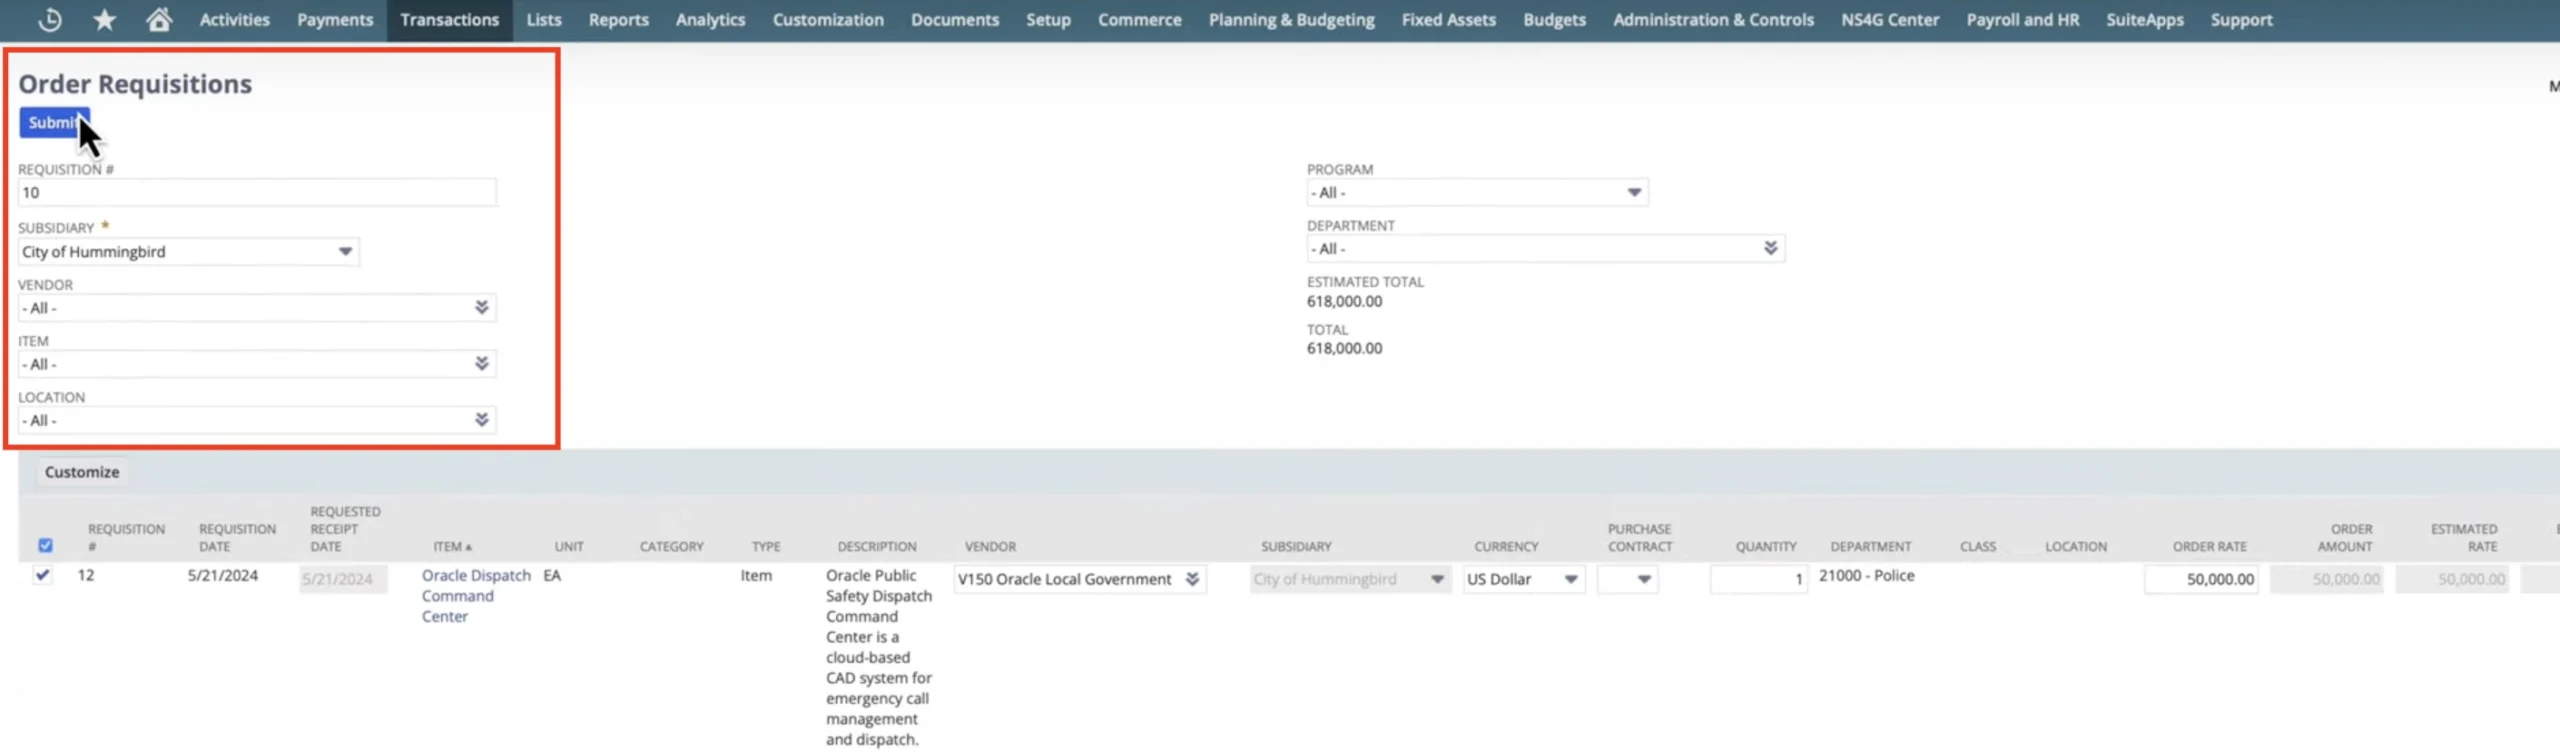
Step 4: Convert Requisition to Purchase Order
Once the requisition is approved, you can create a purchase order.
- Navigate to: Transactions > Purchases > Enter Purchase Order
- The purchase order will pull data from the requisition form.
- Review and update any necessary details.
- Status: The purchase order will wait for goods receipt once submitted.


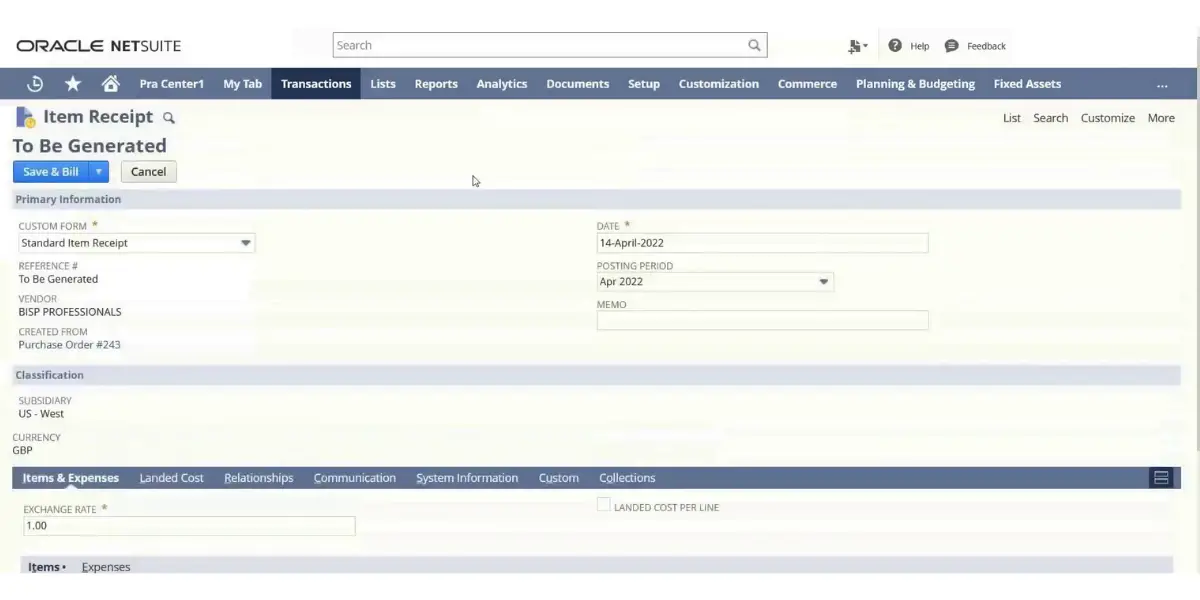
Step 5: Record Receipt of Goods
When the goods arrive, you need to record the receipt in NetSuite.
- Navigate to: Transactions > Purchases > Receive Items
- This step updates your inventory and ensures that the purchased items are accounted for in the system.
Step 6: Create an Invoice for Received Goods
Once the goods have been received, an invoice needs to be created.
- Navigate to: Transactions > Purchases > Enter Invoice
- Link the invoice to the appropriate purchase order or receipt.
- Review quantities and pricing against what was received.

Step 7: Process Payment for the Invoice
After verifying the invoice, proceed with making the payment.
- Navigate to: Transactions > Payables > Pay Bills
- Select the vendor and invoice for payment.
- Choose the payment method (e.g., check, ACH) to complete the transaction.
Step 8: Update General Ledger (GL) Impact
Once the payment is processed, NetSuite will automatically update the General Ledger (GL) to reflect the transaction.
- Navigate to: Bill Payment > Action > GL Impact
- This ensures accurate financial reporting and compliance.
Challenges Addressed by NetSuite in the Procure to Pay Process
- Manual Processes: Without automation, procurement processes can be tedious and error-prone. NetSuite automates P2P, reducing manual data entry and minimizing errors in purchase orders, receipts, and payments.
- Lack of Visibility: In many systems, procurement data is scattered. NetSuite integrates procurement with finance, providing a clear, unified view of cash flow, budgets, and procurement activities. This visibility is crucial for decision-makers.
- Inconsistent Approval Processes: Manual approval processes can be slow and inconsistent. NetSuite streamlines and enforces consistent approval workflows to ensure compliance and prevent unauthorized purchases.
- Supplier Management Challenges: Keeping track of multiple vendors and contracts can be difficult. NetSuite centralizes vendor data, making it easier to manage relationships, evaluate vendor performance, and ensure compliance with contract terms.
Advantages of Using NetSuite for P2P
- Streamlined Cash Flow Management: By automating the P2P cycle, NetSuite helps make payments on time. This improves vendor relationships and avoids late payment fees. This also contributes to better cash flow management.
- Better Financial Reporting and Compliance: With real-time data and clear reports, businesses can track spending easily. They can analyze trends and make sure they follow internal policies.
- Better Supplier Negotiations: By tracking vendor performance and historical spending, businesses can negotiate better prices, discounts, and terms with suppliers.
- Reduced Costs and Time Savings: Automation reduces manual work, saves time, and limits administrative costs. With improved visibility and better process control, businesses can identify cost-saving opportunities more easily.
NetSuite P2P Integration with Other Business Functions
NetSuite doesn’t operate in isolation. Its P2P process integrates seamlessly with other NetSuite modules like financial management, netsuite inventory management, and order management. When someone creates a purchase order, the system automatically updates financial records and inventory levels. The integration helps businesses avoid data duplication, reduce manual data entry, and ensure accurate financial reporting.

Conclusion
NetSuite’s Procure-to-Pay module offers a comprehensive solution to streamline procurement, improve financial management, and reduce errors. From purchase requests to vendor payments, every step in the P2P cycle is automated. This automation provides efficiency, accuracy, and cost control.
By leveraging NetSuite’s capabilities, businesses can optimize their procurement processes, ensure timely payments, and foster stronger vendor relationships. For companies that want to improve their procurement activities, NetSuite’s P2P solution is a strong tool. It helps businesses get better results and work more efficiently.